Taking a Product Through CRA Compliance
Audience. A manufacturer running one product with digital elements through CRA self-assessment, from classification to a draft Declaration of Conformity.
Outcome. A classified product, a completed Annex I self-assessment with evidence attached, a generated technical file, and a periodic review clock running.
Why it matters. Full CRA obligations apply from 11 December 2027. Products in Annex III Class I or Class II cannot use pure self-assessment, and finding that out late is expensive. Classification is therefore the first step, not a formality.
Time required. Classification and conformity route take under an hour. The full Annex I assessment and evidence collection are a project measured in weeks and involve engineering.
Prerequisites.
- SOP-01 complete, or at least a verified workspace.
- The product manual, datasheet or requirements documentation.
- Someone who can speak to the product architecture, for the risk assessment.
A note on the two sides of the app. The left rail switches between CVD Portal, which handles vulnerability intake, and CRA Portal, which handles product conformity. This SOP works entirely in the CRA Portal side.
The flow at a glance
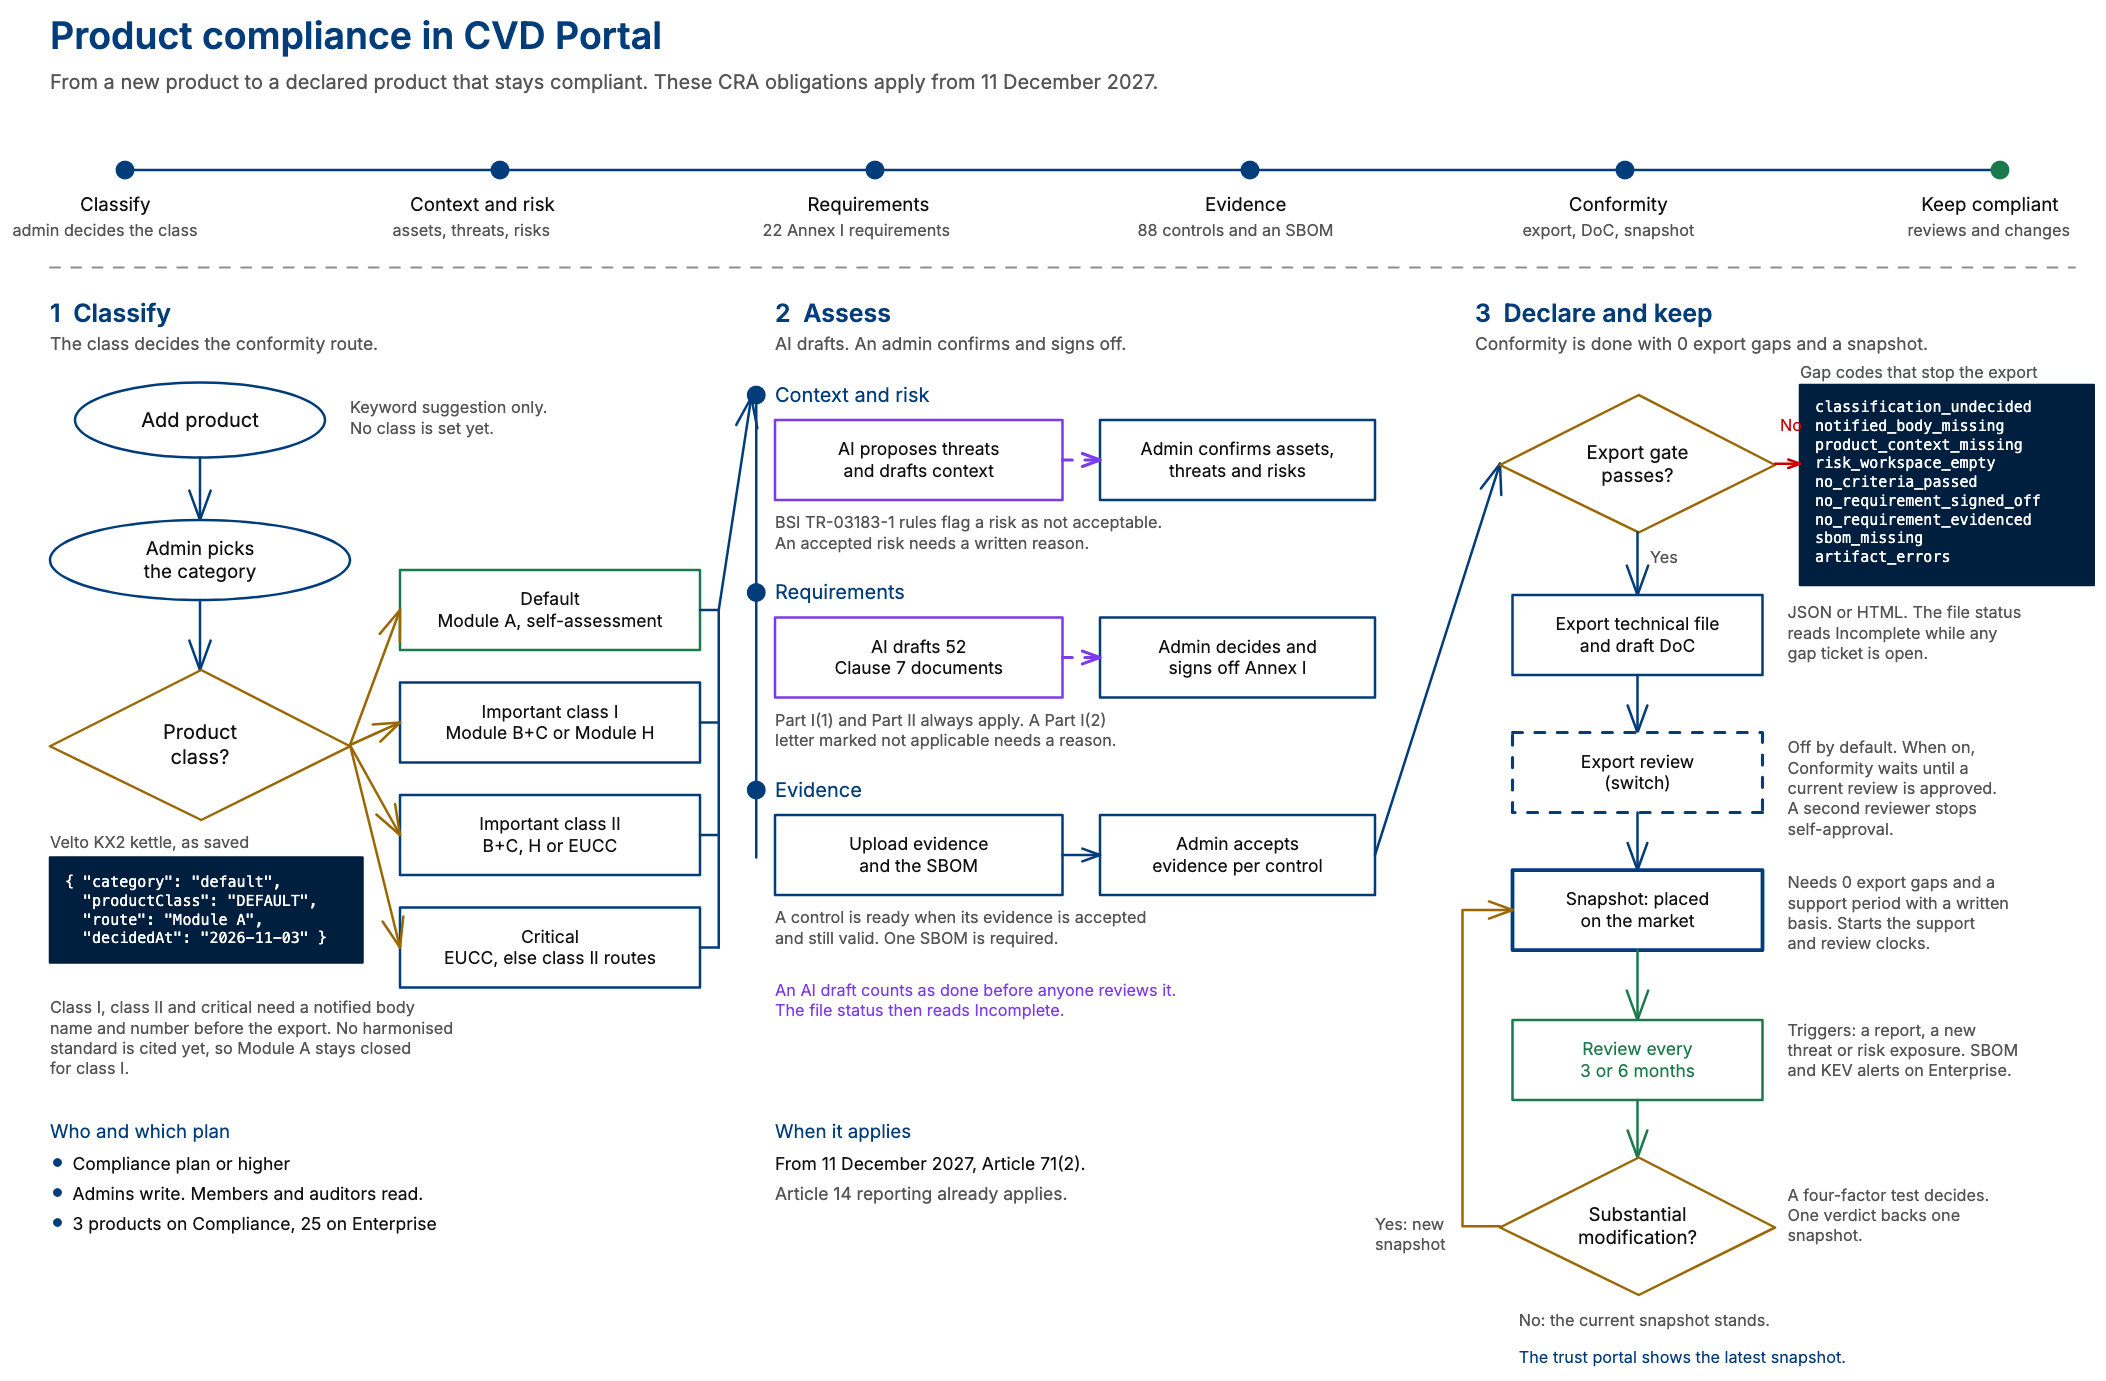
The diagram shows the six stages on one page, from a new product to a product that stays compliant. The steps below explain each part. Select the diagram to open it at full size. The example product is fictional.
Step 1. Open the CRA overview
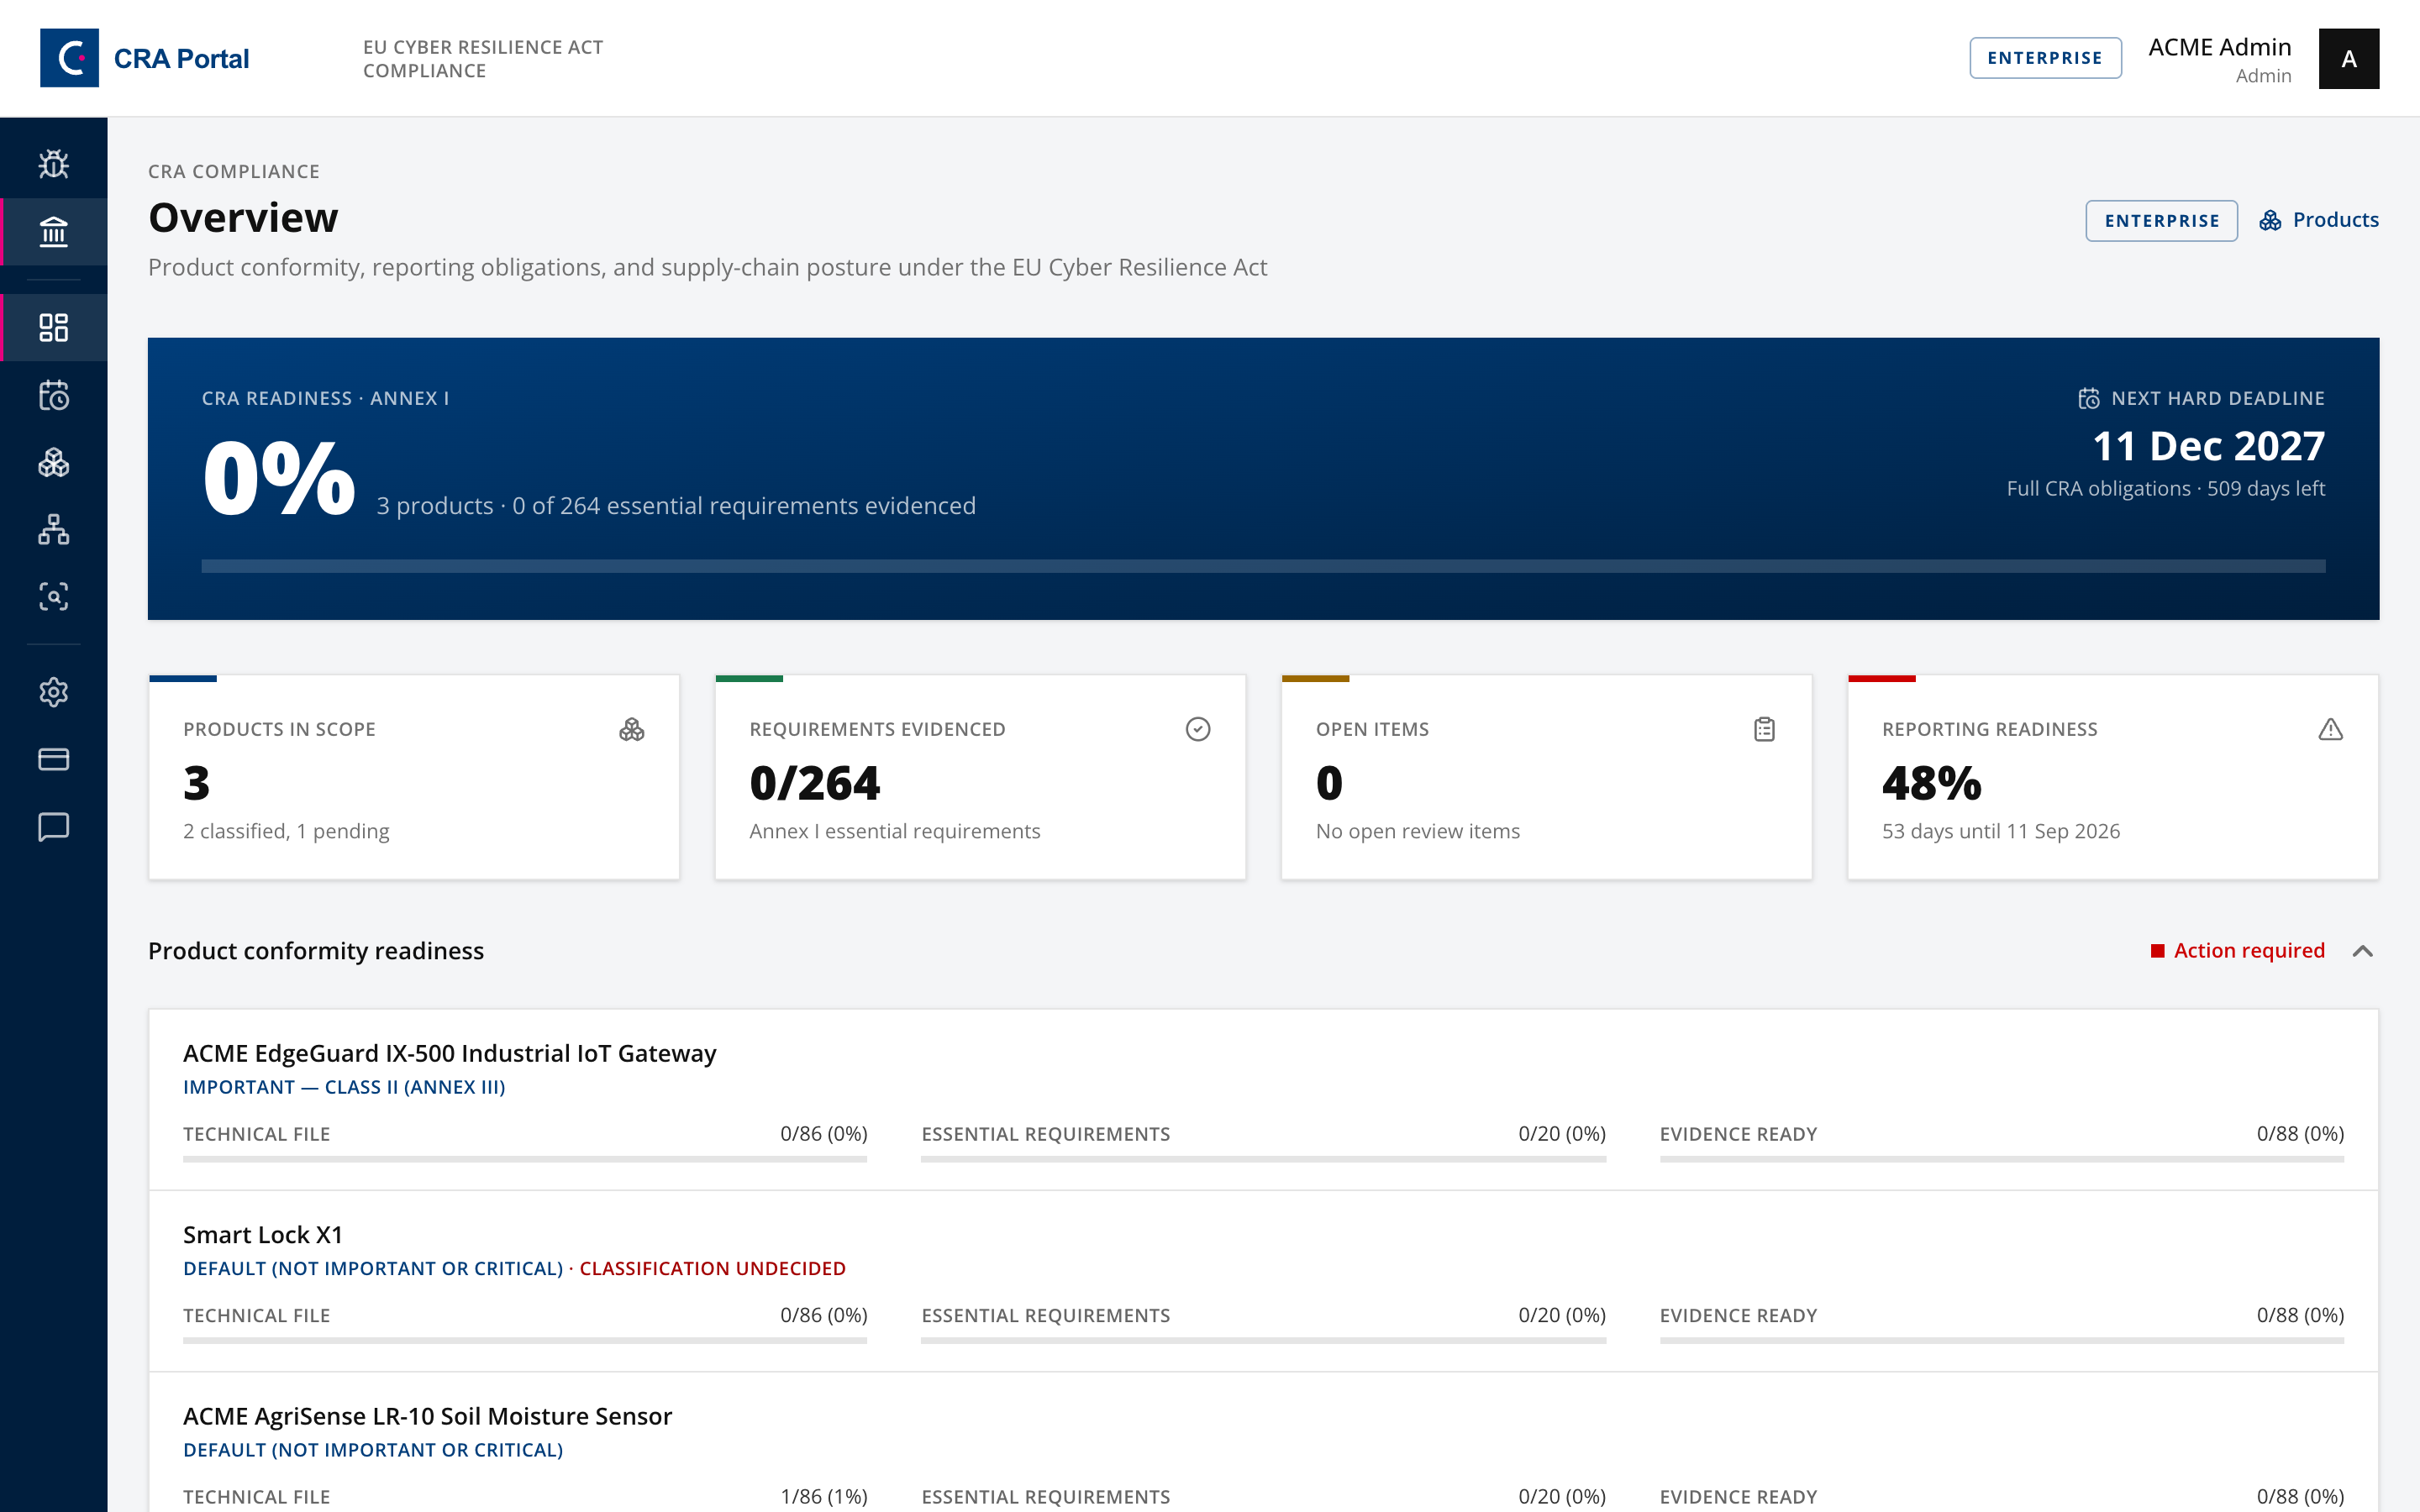
Switch the rail to CRA Portal and open Overview.
The overview is the status board for everything CRA. It shows products in scope, how many Annex I essential requirements are evidenced, open review items, and reporting readiness against the 11 September 2026 date.
Product conformity readiness lists each product with its classification, technical file progress, essential requirements progress and evidence progress.
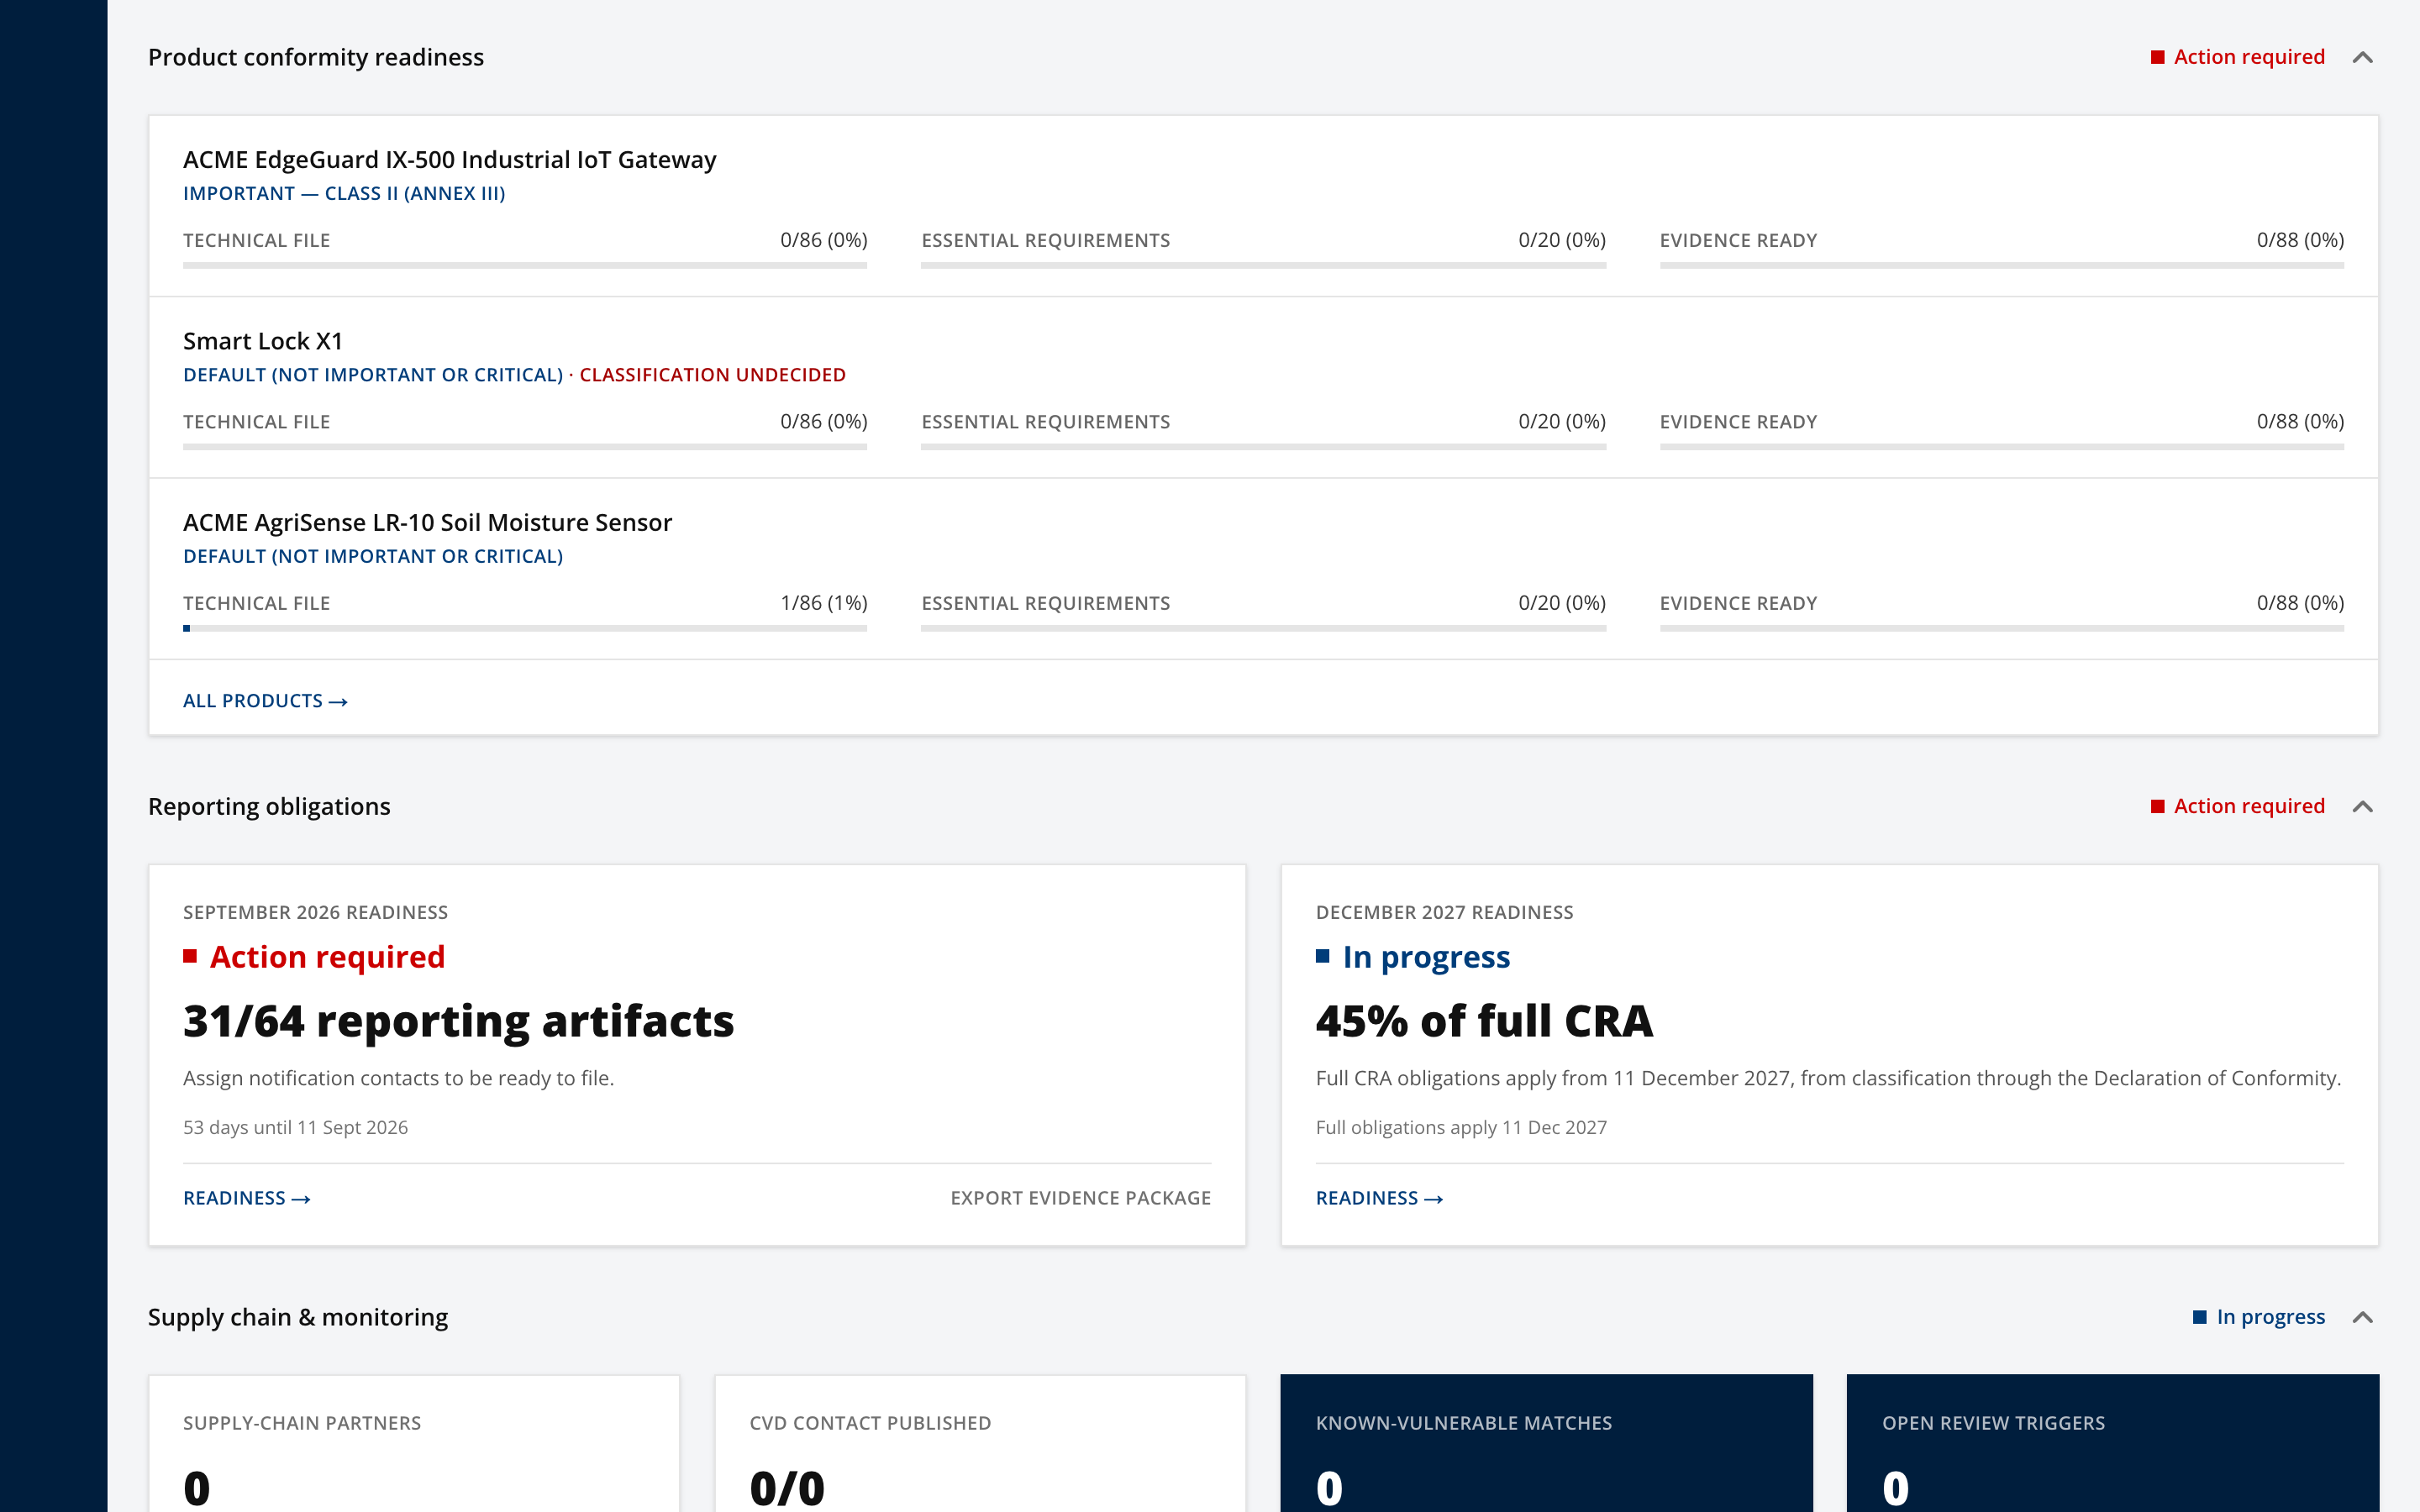
Use this panel to decide which product to work. Anything showing "Not yet classified" is blocked from being placed on the market and should be handled first.
Step 2. Add the product
Open Products. Select "Add product". Then select "Blank product".
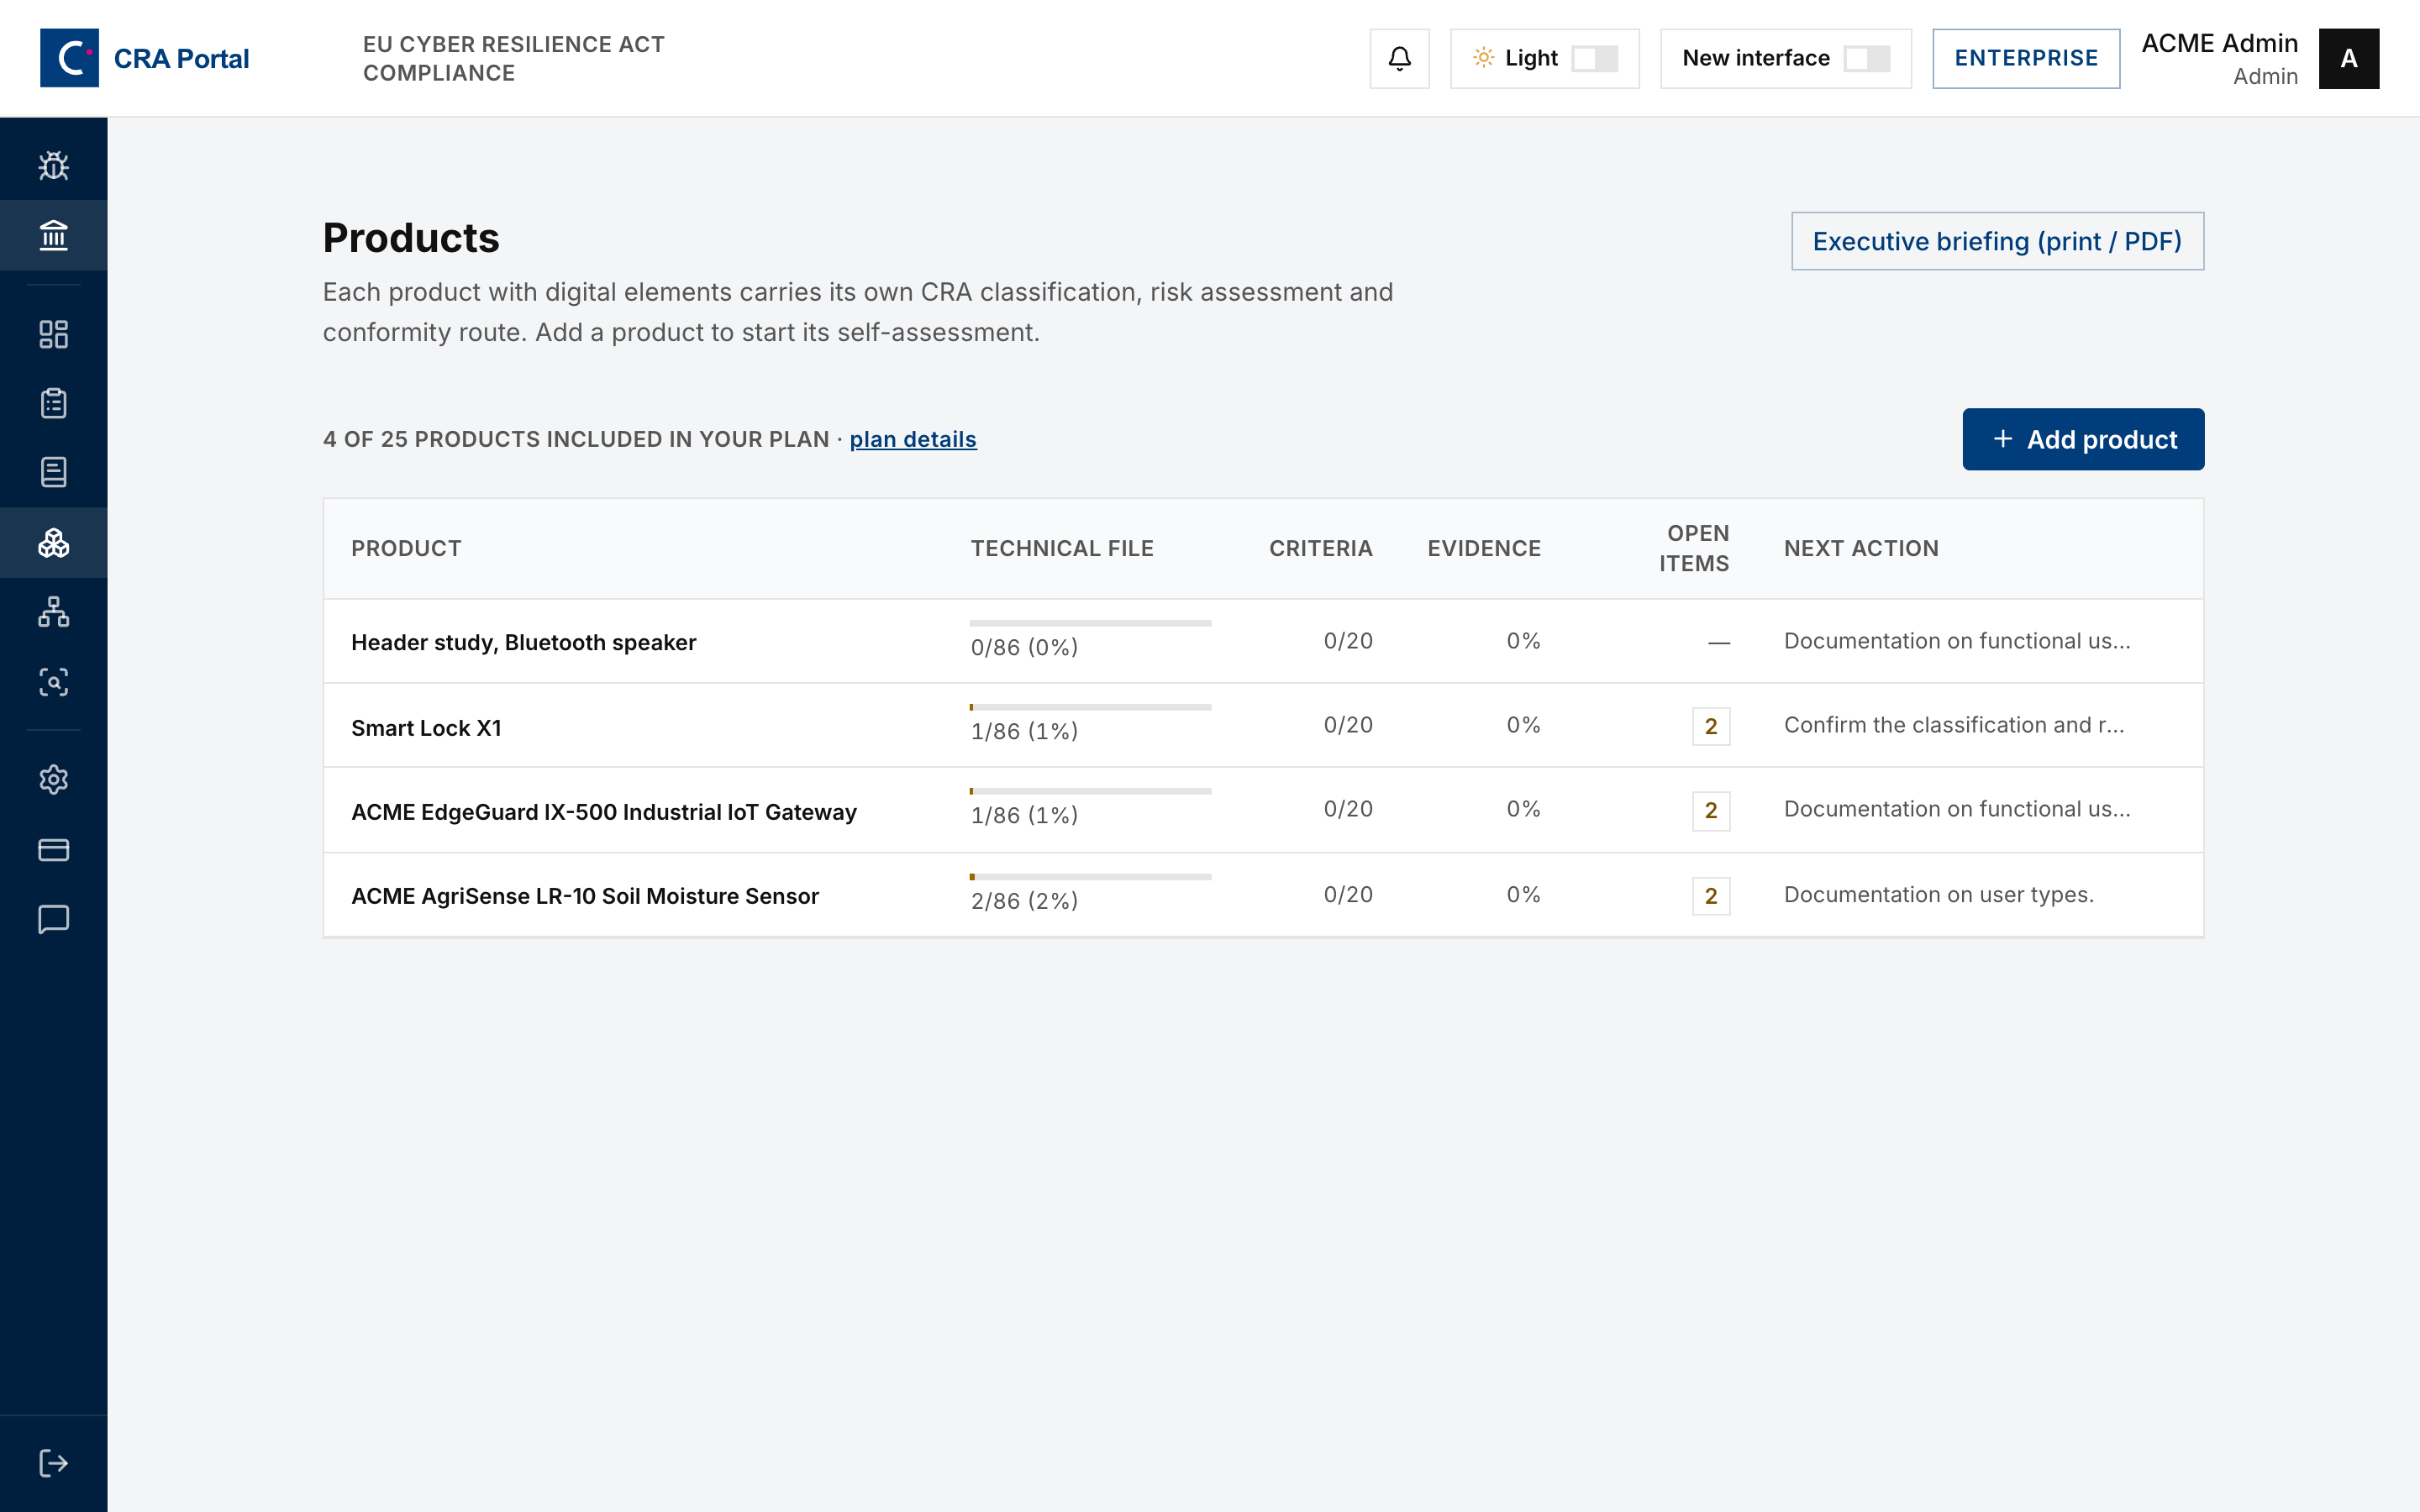
Give the product a name and a short functional description, for example "Home internet router with VPN and firewall".
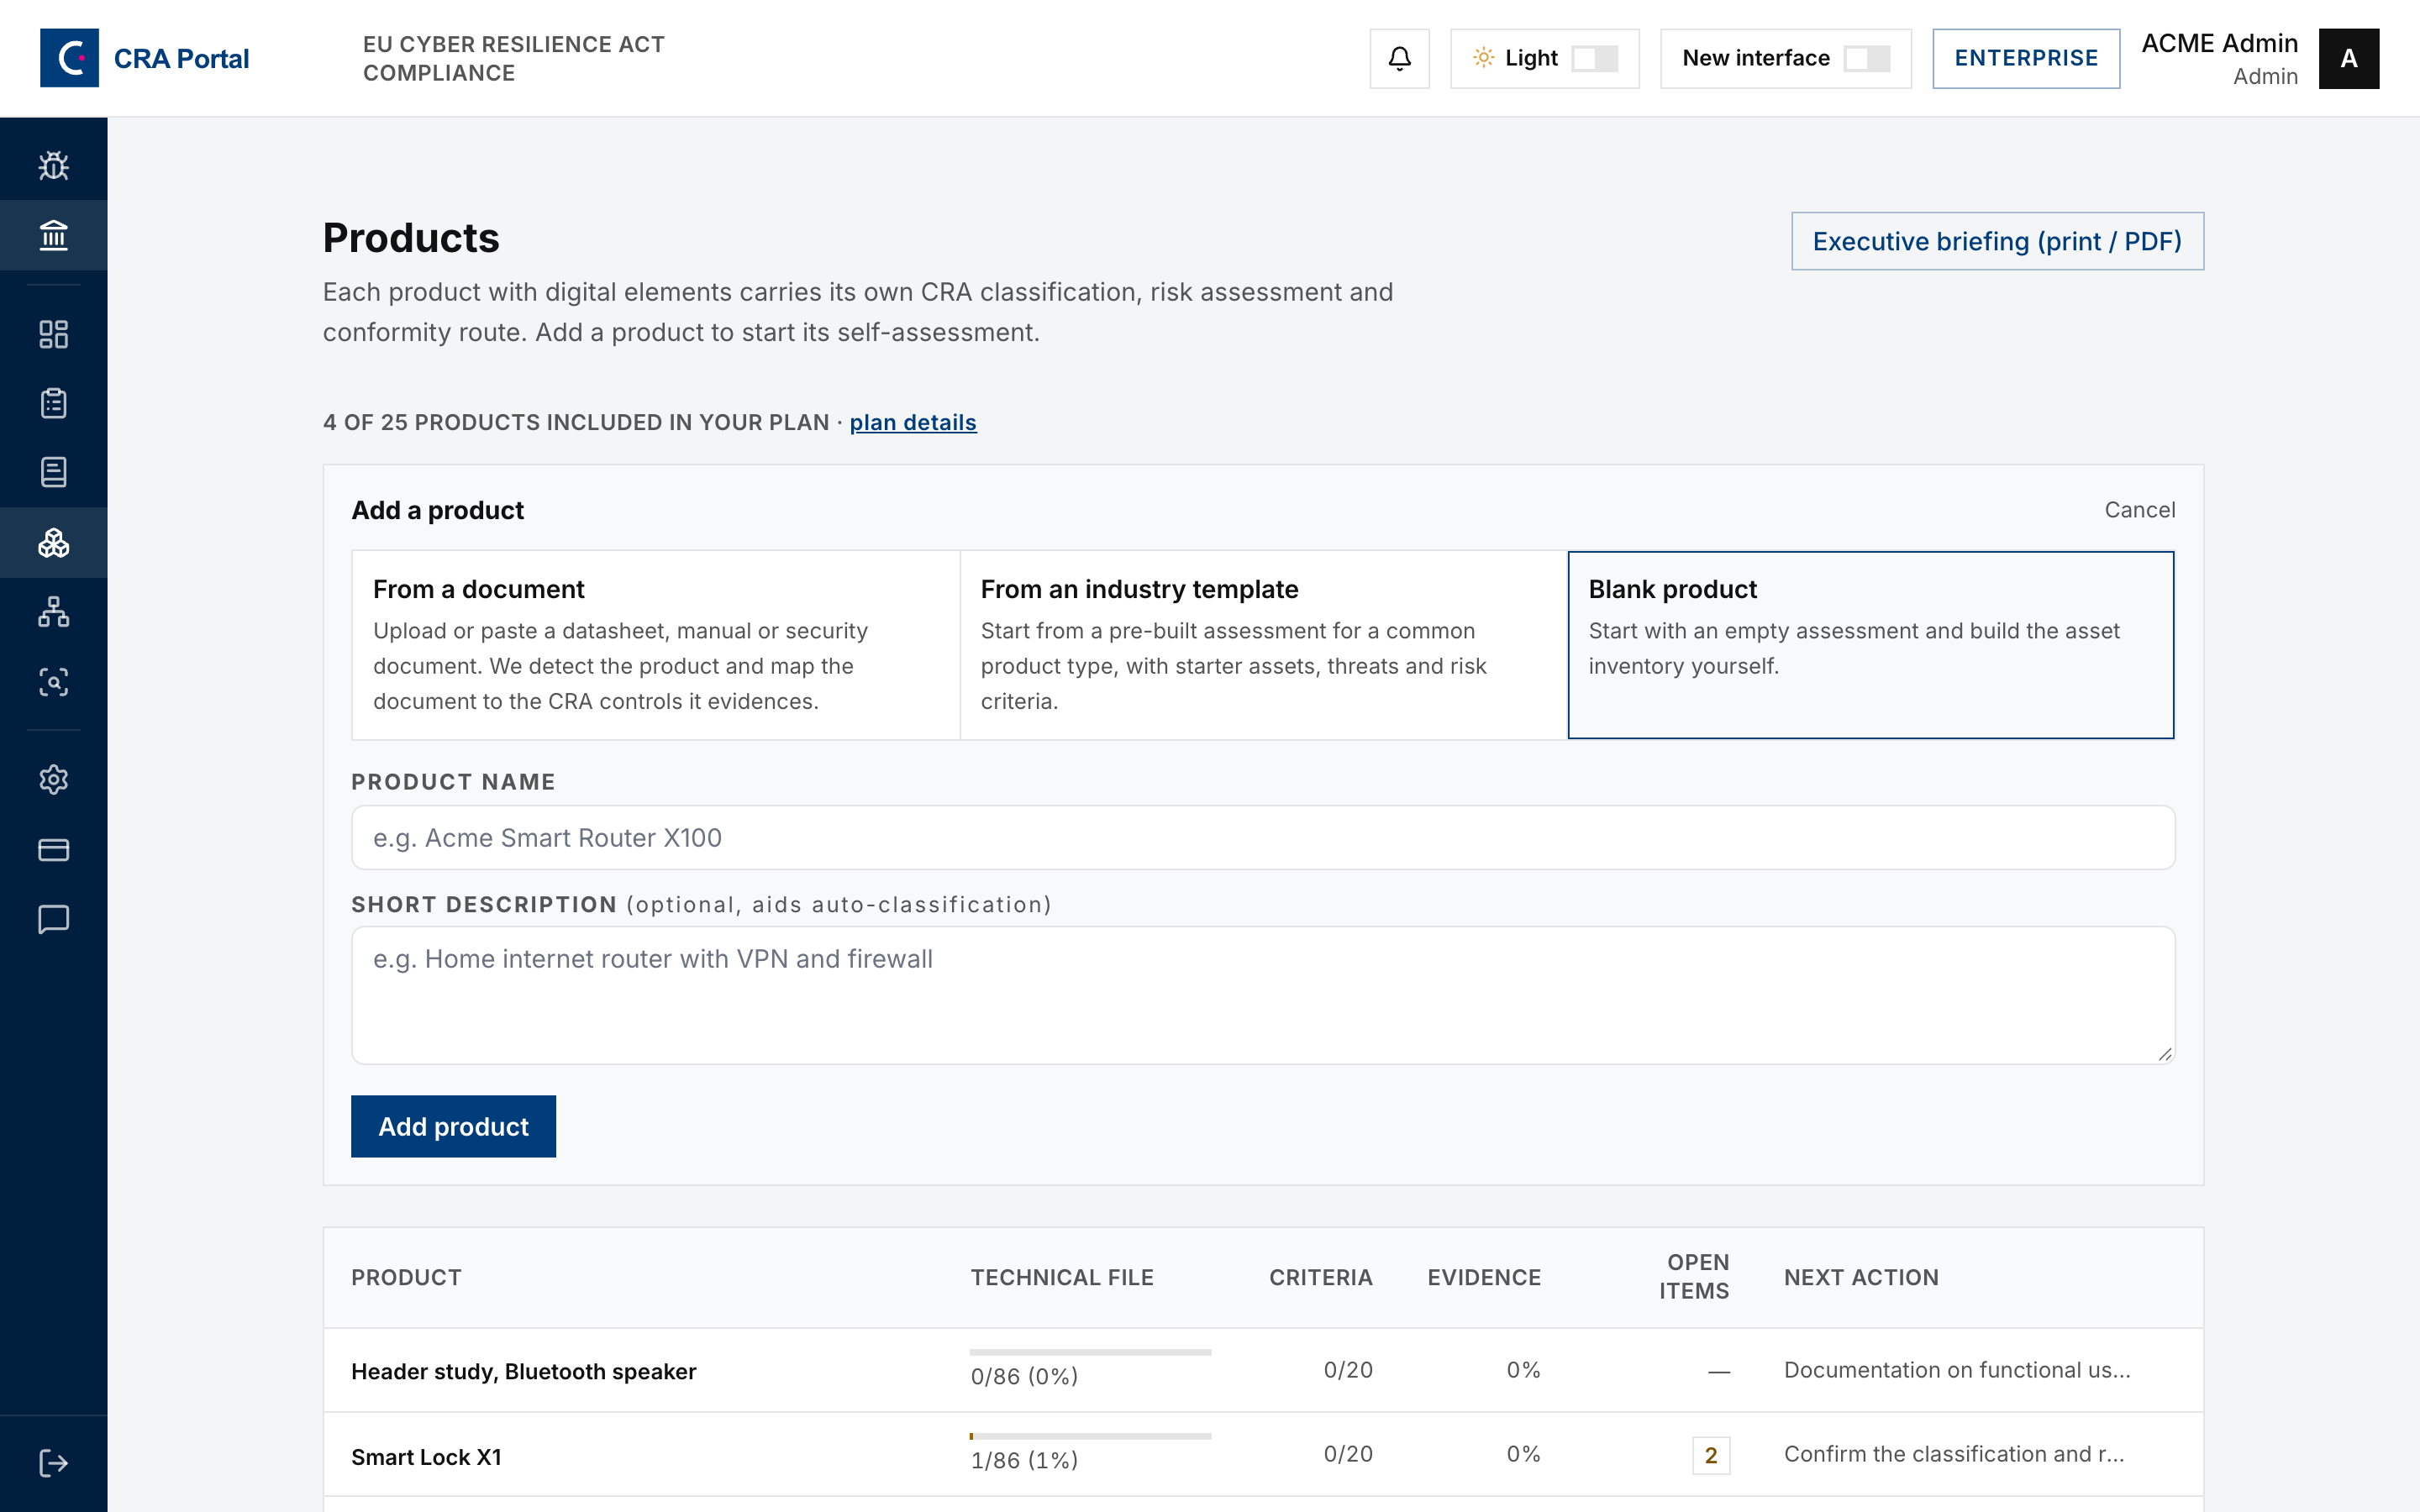
Write the description in terms of what the product does, not what it is called internally. The description feeds the classification decision and the drafted artifacts, so a vague description produces vague output.
If you already have a manual or datasheet, select "From a document" in the same panel. It extracts the product context automatically.
If you reached the product limit of your plan, "Add product" opens the "Add products" page, where an admin buys extra products. See Billing.
Step 3. Read the product workspace
Open the product. The header carries the classification, the conformity route and the stage bar. The bar has six stages, from Classify to Keep compliant. Each stage opens the tab with the same name.
Export checks and progress below the stage bar opens the readiness card and three progress counters for technical file artifacts, criteria passed and evidence ready. The readiness card gives the single next action, as an ordered path of the checks that gate the export. A product walks 7 to 9 checks. The notified body check appears only on a route that needs a notified body. It needs the name, the 4-digit number and the procedure the body performs. The artifact check appears only while a drafted artifact has an error. Work the current step rather than guessing where to go next. Remaining work opens the full list of what is still outstanding, which is a longer list than the checks, because the checks are minimum thresholds.
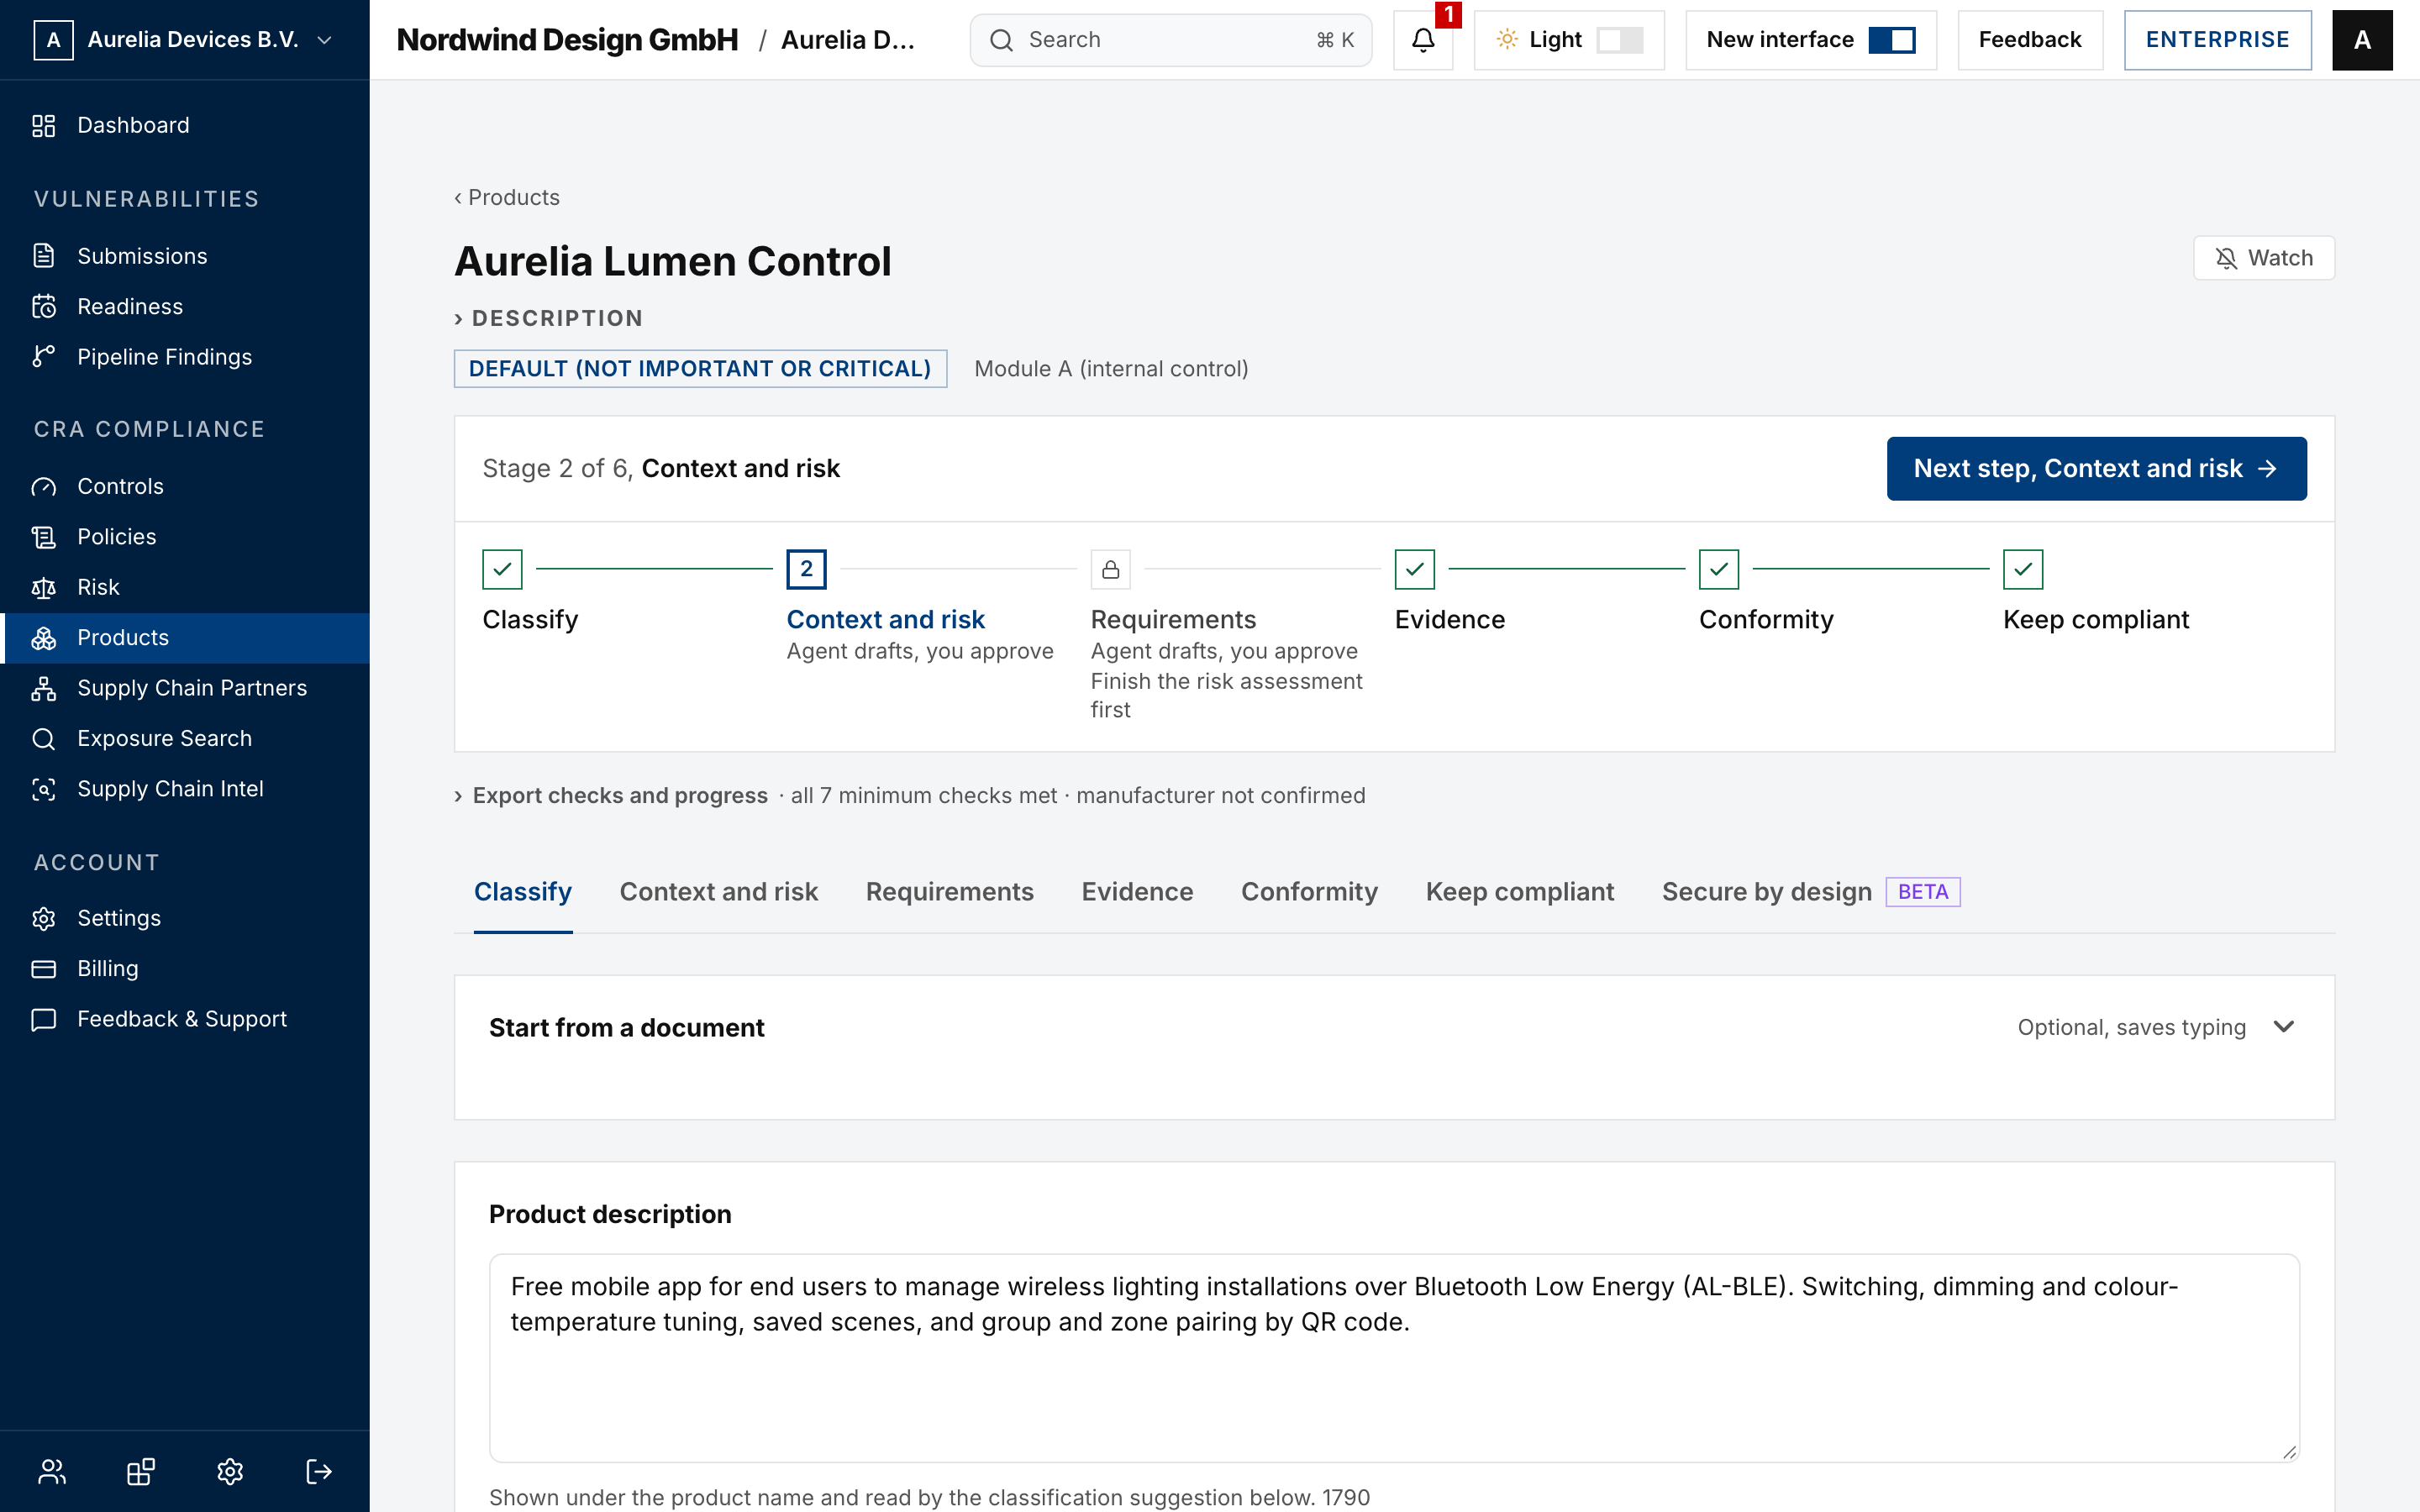
The product page has seven tabs. Only an Admin sees Requirements, Keep compliant and Secure by design.
- Classify. Product description, classification, conformity route.
- Context and risk. Product context, threat model, risk assessment, risk register.
- Requirements. The 22 Annex I requirements with owners, evidence and sign-off.
- Evidence. Attached evidence mapped to controls.
- Conformity. Technical file, Declaration of Conformity, CE marking, user information.
- Keep compliant. Periodic review clock and review triggers.
- Secure by design. The ENISA secure-by-design playbooks. This tab is in beta.
Step 4. Decide the CRA classification
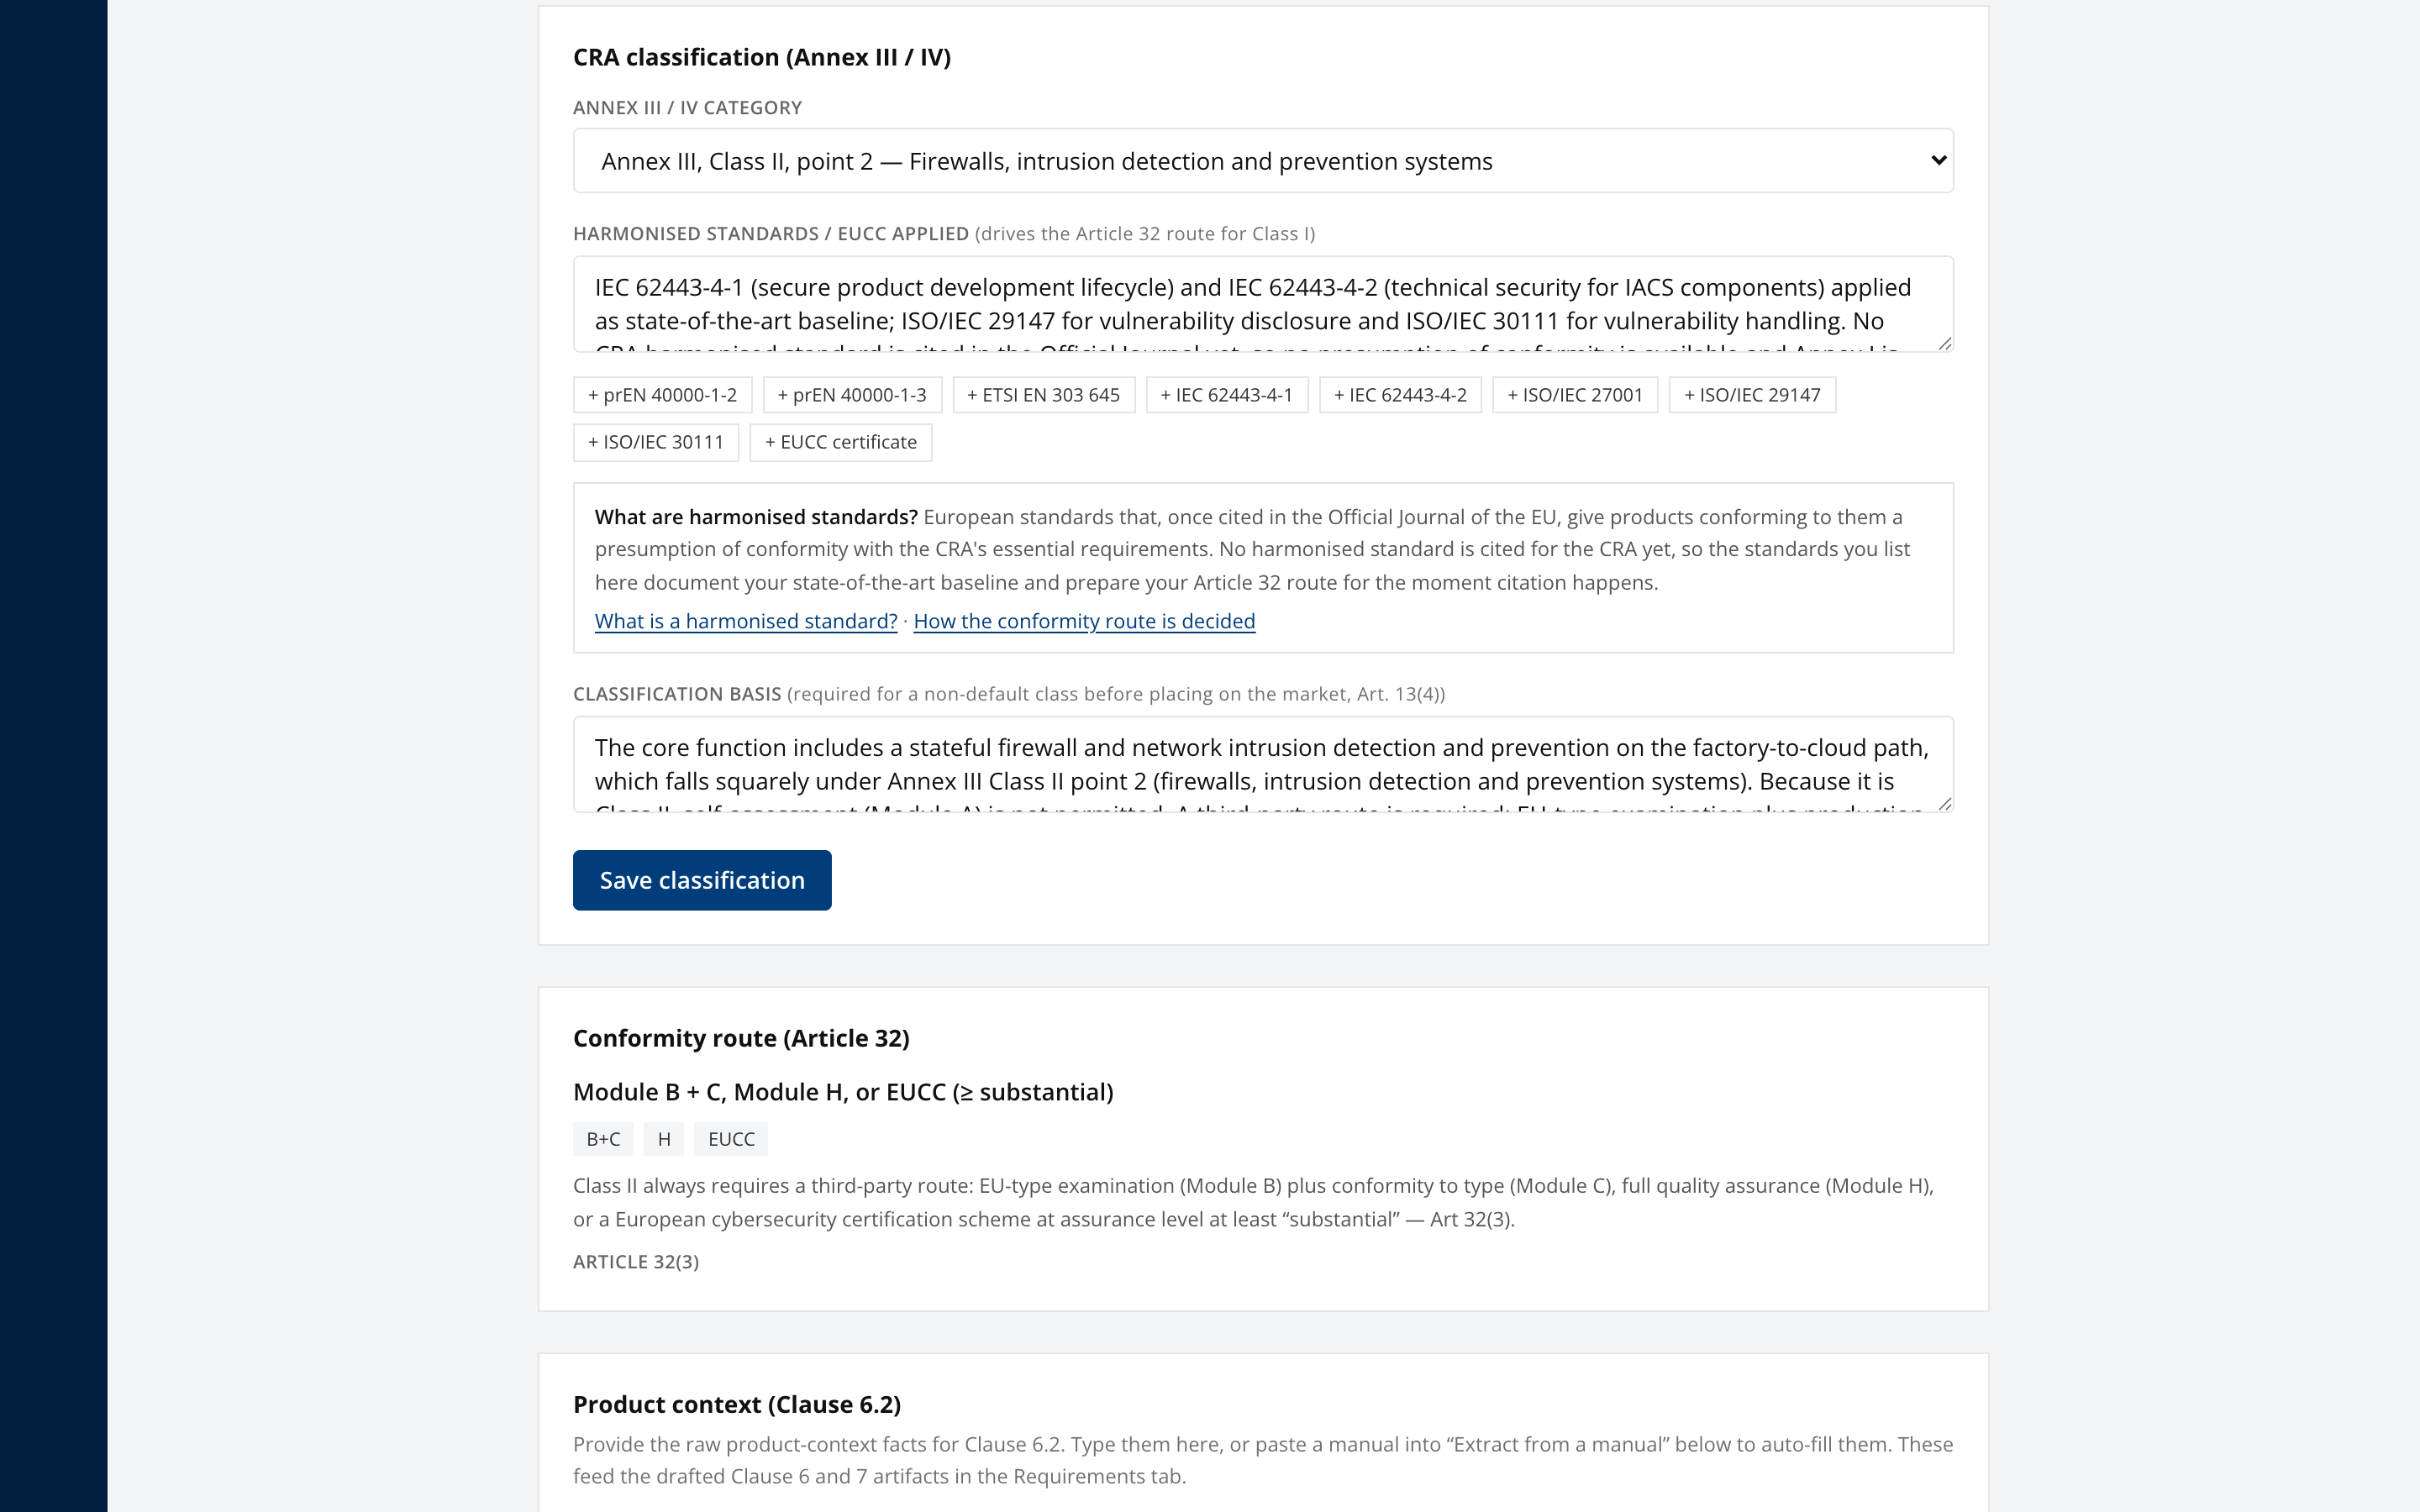
On the Classify tab, open CRA classification (Annex III / IV).
Until you decide it, the product header reads Not yet classified and states no conformity route. Nothing is chosen for you. The category dropdown starts on "Choose a category" and Save classification stays disabled until you pick one, because this decision is what sets whether the product can self-assess under Module A or needs a notified body.
Select the Annex III or Annex IV category the product falls into, or Default, not important or critical if it is neither.
If a category was suggested
Where the product name and description match an annex category, the panel shows it above the dropdown, labelled Suggested, not decided. It is a proposal and it is never pre-selected. Read it before accepting.
The suggestion shows three things that let you check it.
- The phrase it matched on. The suggestion comes from vocabulary in your product text, not from understanding the product. A patio heater remote whose description says the product "switches" a heater has nothing to do with network switches, and seeing
matched on: switchmakes that obvious at a glance. - The scope test. What the category covers and, just as importantly, what it does not. Annex III Class I point 12 covers routers, modems and network switches. It does not cover a product that merely contains a switch, a relay or a button.
- The cost. Where accepting the suggestion would put the product on a third-party route, the panel says so before you accept, in the same words as the route panel below.
The deciding factor is the product's core functionality, which is the test Implementing Regulation (EU) 2025/2392 sets. Doing extra things does not take a product out of a category, and merely being able to do what a listed category does does not put it in one. A router that also firewalls is still a router. A smartphone that integrates an operating system and a password manager is neither of those things.
Select Use this category to accept the suggestion, or Not this, I'll choose to dismiss it and pick from the list. Neither writes anything until you save.
Where no suggestion appears, nothing matched closely enough to propose. That is the common case, and most products in CRA scope are default products.
Whatever you pick, the panel immediately below the dropdown states the resulting conformity route and whether it needs a paid third-party assessment, so the consequence is visible before you commit.
Answer Security standards applied. Answering "Not yet" records that none has been applied and clears the list. Answering "Yes" opens a tick list of the common standards, grouped by the question each one answers rather than by its number, so you can find the right row without recognising the code: how you handle reported vulnerabilities (ISO/IEC 29147, ISO/IEC 30111), your development process (IEC 62443-4-1, ISO/IEC 27001), product security features (ETSI EN 303 645, IEC 62443-4-2, prEN 40000-1-2, prEN 40000-1-3) and formal certification (EUCC). Each row gives the plain-language name and a one-line explanation beside the code.
Only tick a standard the product was genuinely built or tested against.
Under the tick list, "What is recorded on the product" shows the whole stored value and stays editable. Ticking a box adds its code there; edit it directly for anything the list does not cover, such as a sector standard or a note on how far a standard was applied.
A product recorded before the tick list existed usually names its standards inside a sentence, for example "ETSI EN 303 645 applied as state-of-the-art". That is not the same as recording the standard as its own entry, so no box is ticked and the Article 32 route does not count it. The panel points this out and names the standards concerned. Tick them to record them properly. Nothing is rewritten for you, because how far a standard was applied is a judgement only you can make.
No harmonised standard is cited in the Official Journal for the CRA yet, so ticking these gives no presumption of conformity today. What you record documents your state of the art baseline and prepares the Article 32 route for when citation happens.
Record the Classification basis. This is required for any non-default class before placing on the market under Article 13(4), so Save classification stays disabled for a non-default category until you write one. The server also refuses a non-default category with no basis, from the API and from an AI agent too. State the reasoning, not just the conclusion.
Select Save classification. That decides the classification and records the decision date. The audit log records who saved it.
Getting this wrong costs in both directions. Optimistically, you build a Module A self-assessment for a product that legally requires a notified body. Pessimistically, you commission a notified body for a product entitled to self-assess, which is a four-figure invoice nobody owed. Classify against the product's core function, and use the scope test in the panel rather than the vocabulary in the category name.
Step 5. Confirm the conformity route
The Conformity route (Article 32) panel derives the permitted routes from the classification.
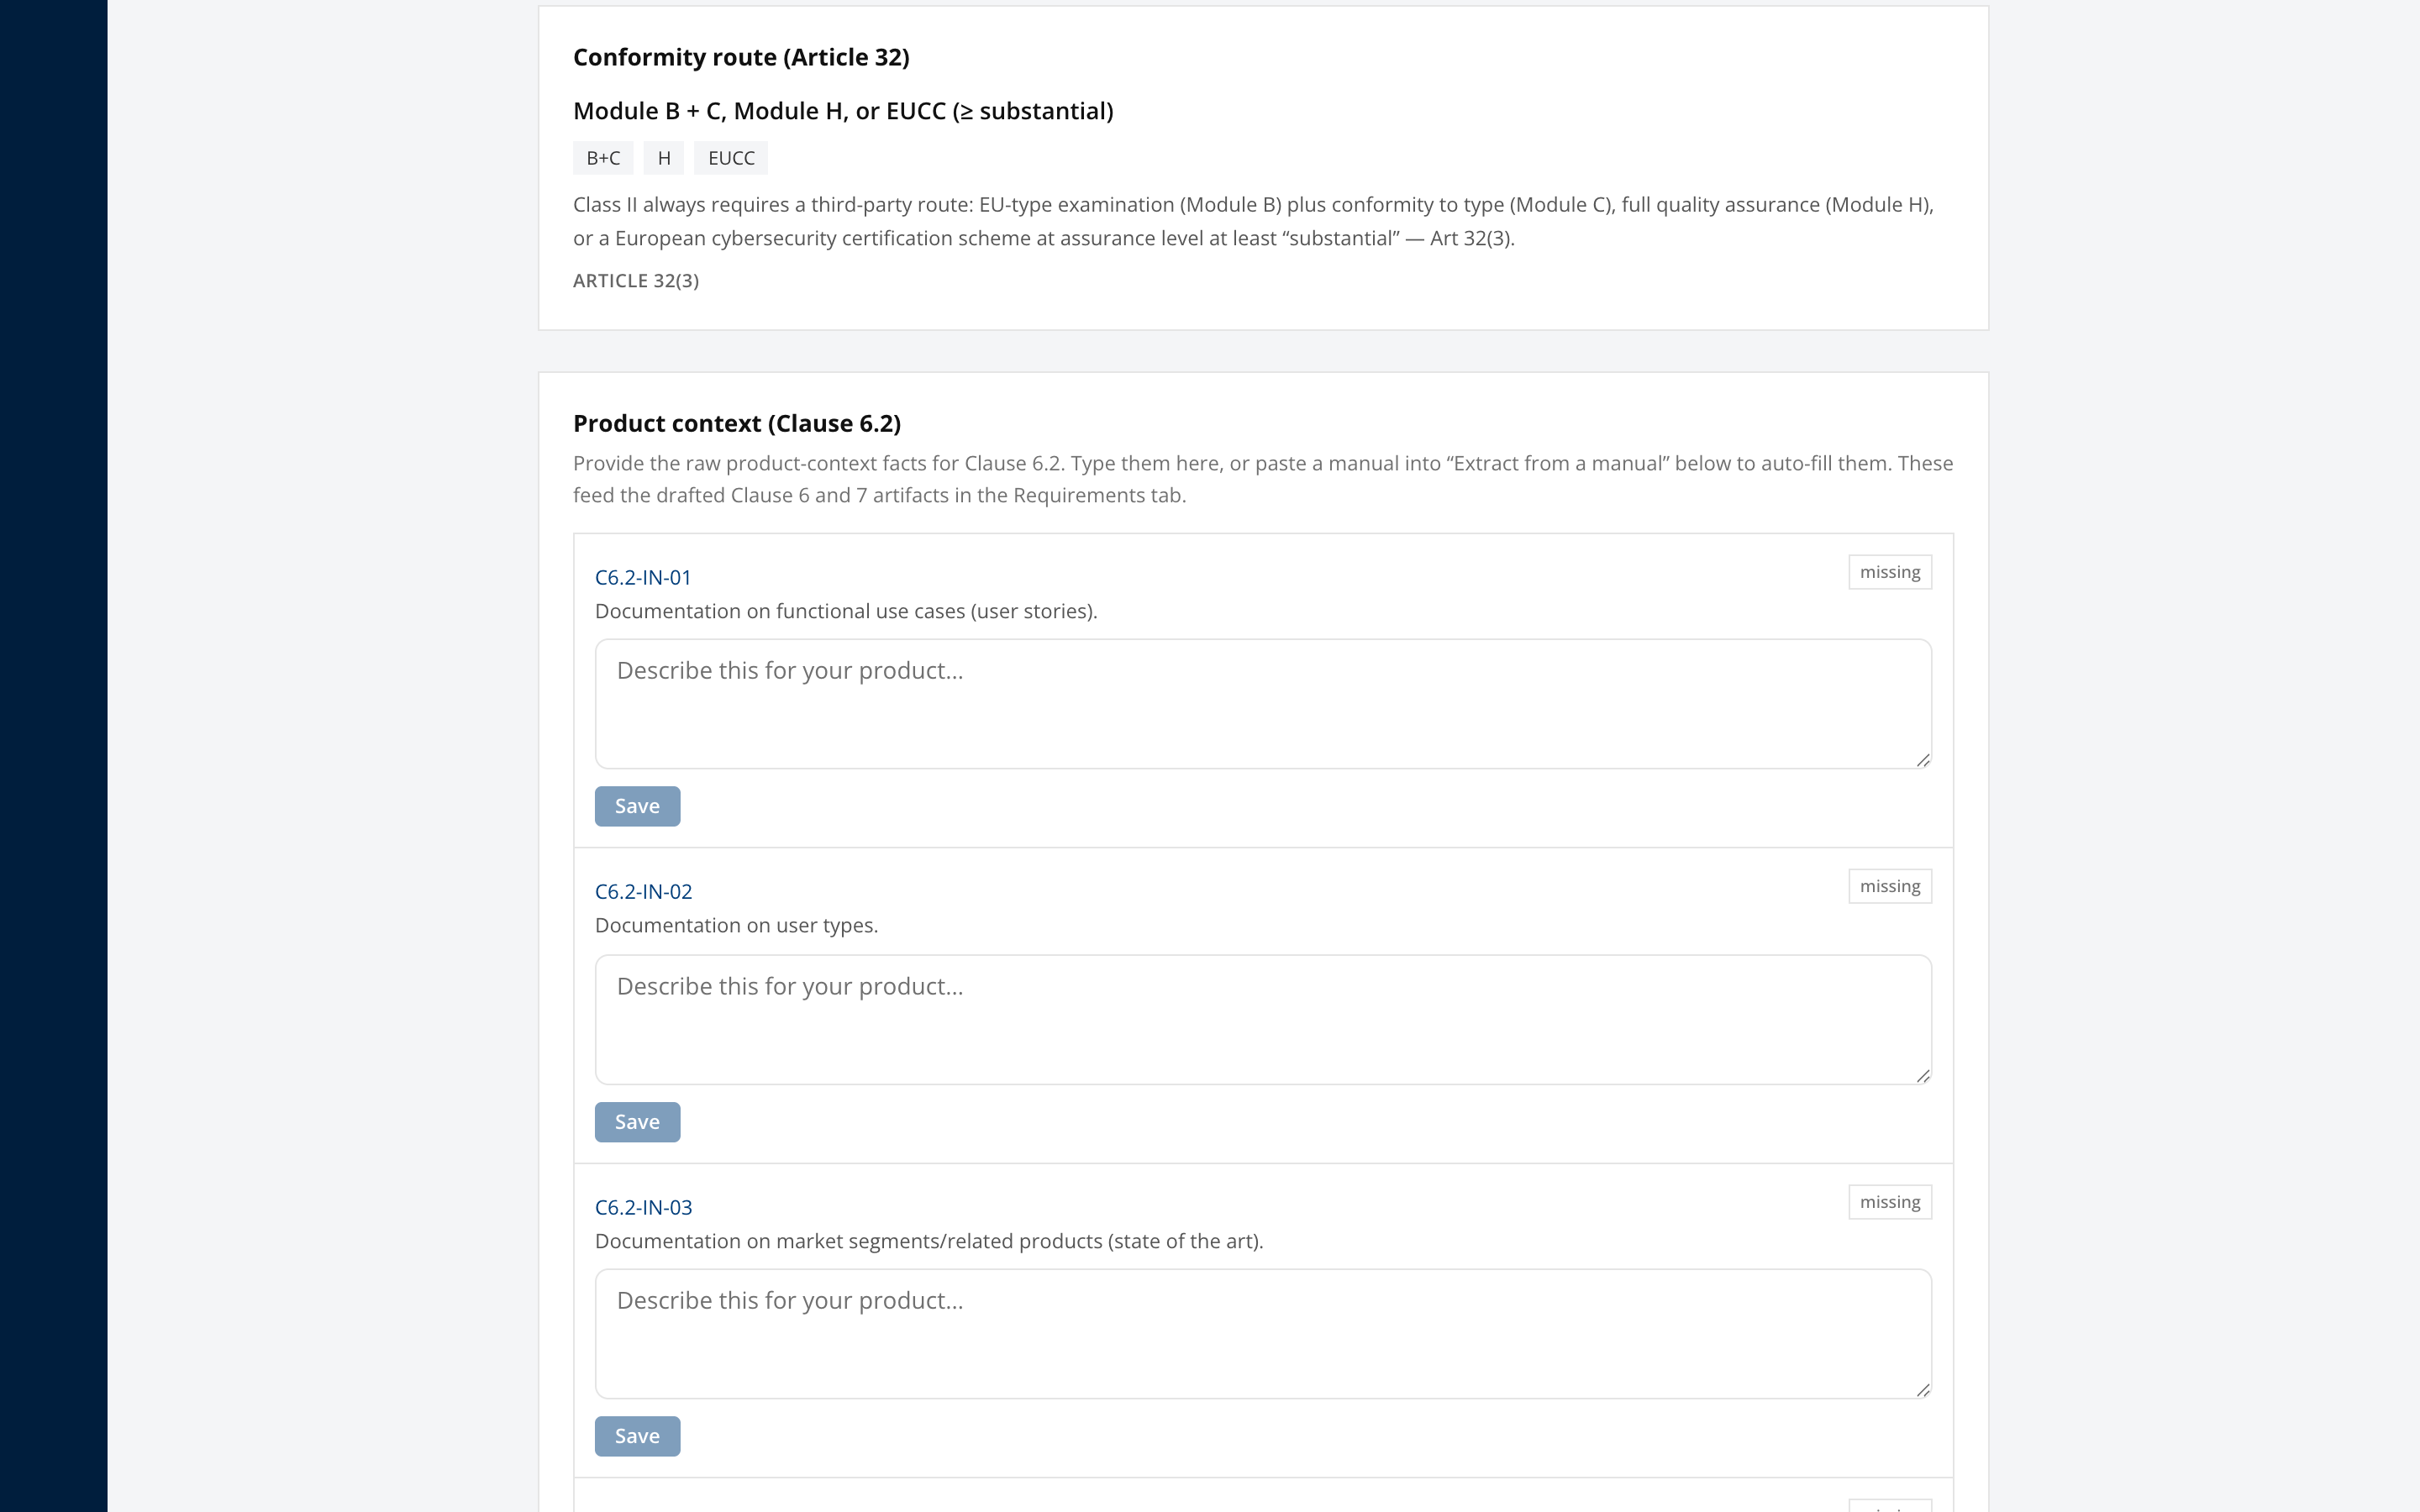
For a Class II product the route is Module B plus C, Module H, or an EUCC scheme at assurance level substantial or higher, per Article 32(3). Self-assessment under Module A is not permitted.
This panel is derived, not chosen. If the route is not what you expected, the classification above it is what needs revisiting.
Step 6. Provide product context
Open Product context (Clause 6.2).
Enter the raw product-context facts, or paste a manual into Extract from a manual to auto-fill them. Each box saves when you move off it, so there is nothing to click. These facts feed every drafted Clause 6 and Clause 7 artifact in the Requirements tab.
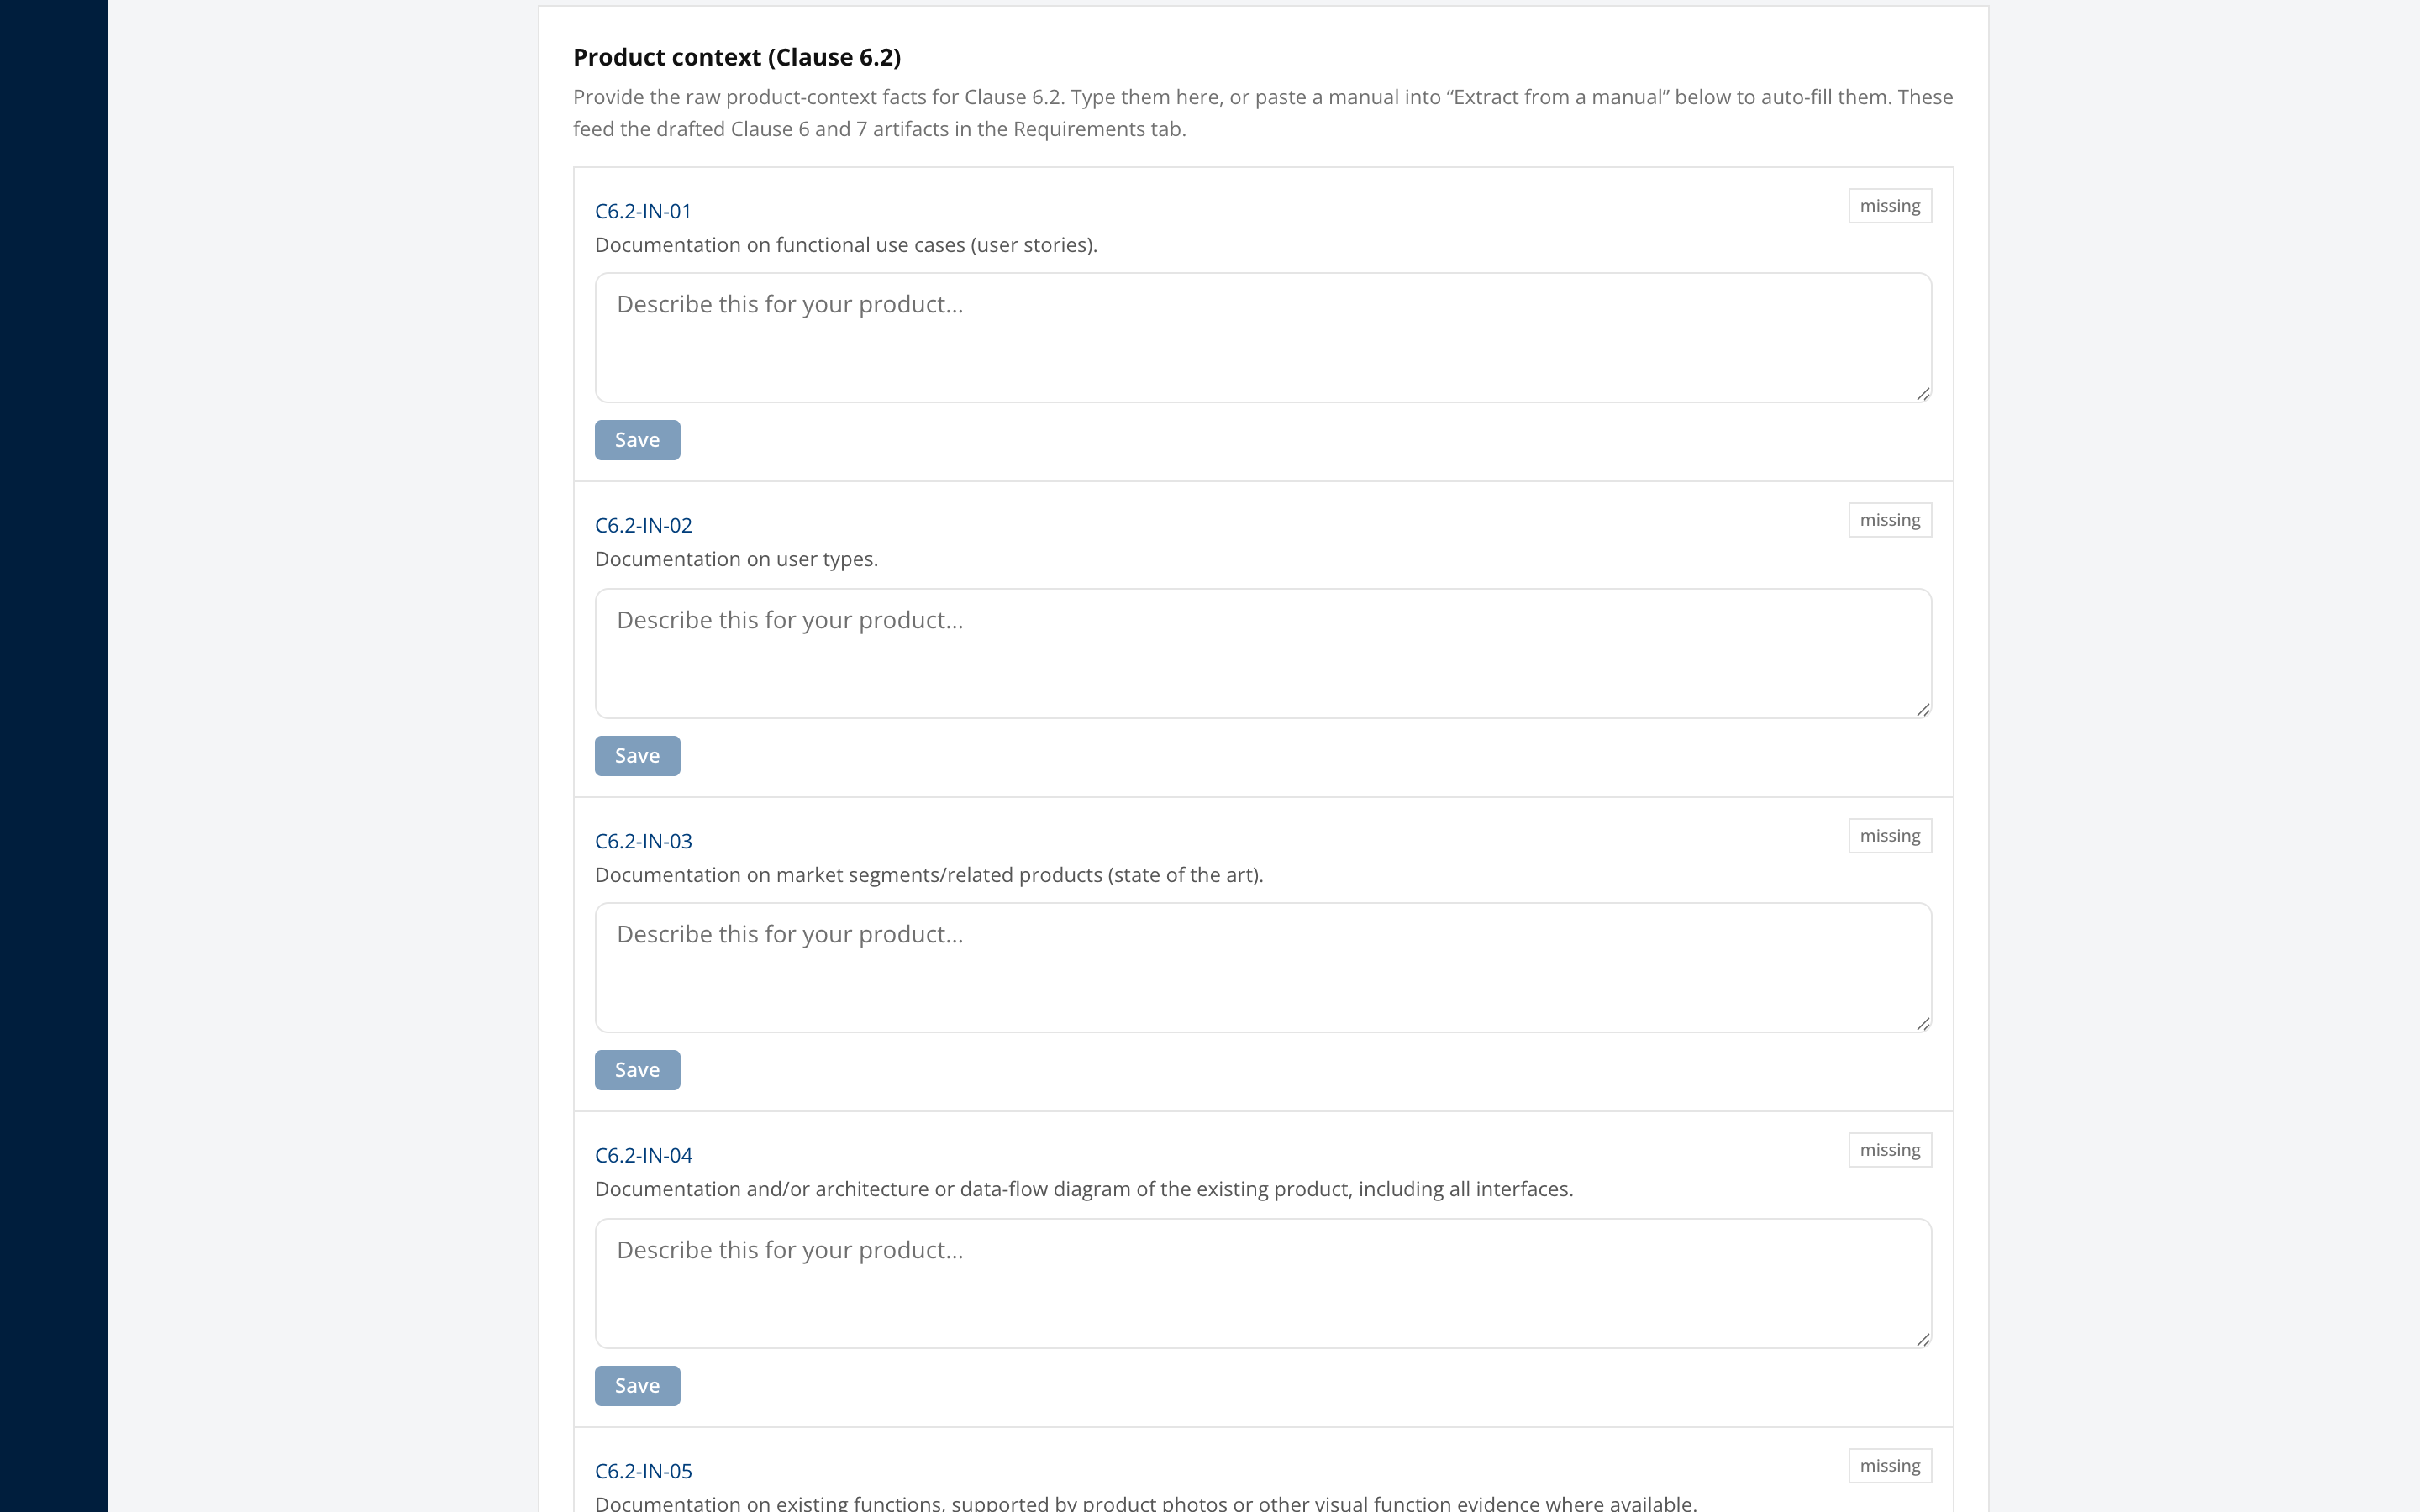
Context quality determines artifact quality. Time spent here is recovered several times over in the Requirements tab.
Step 7. Complete the risk assessment
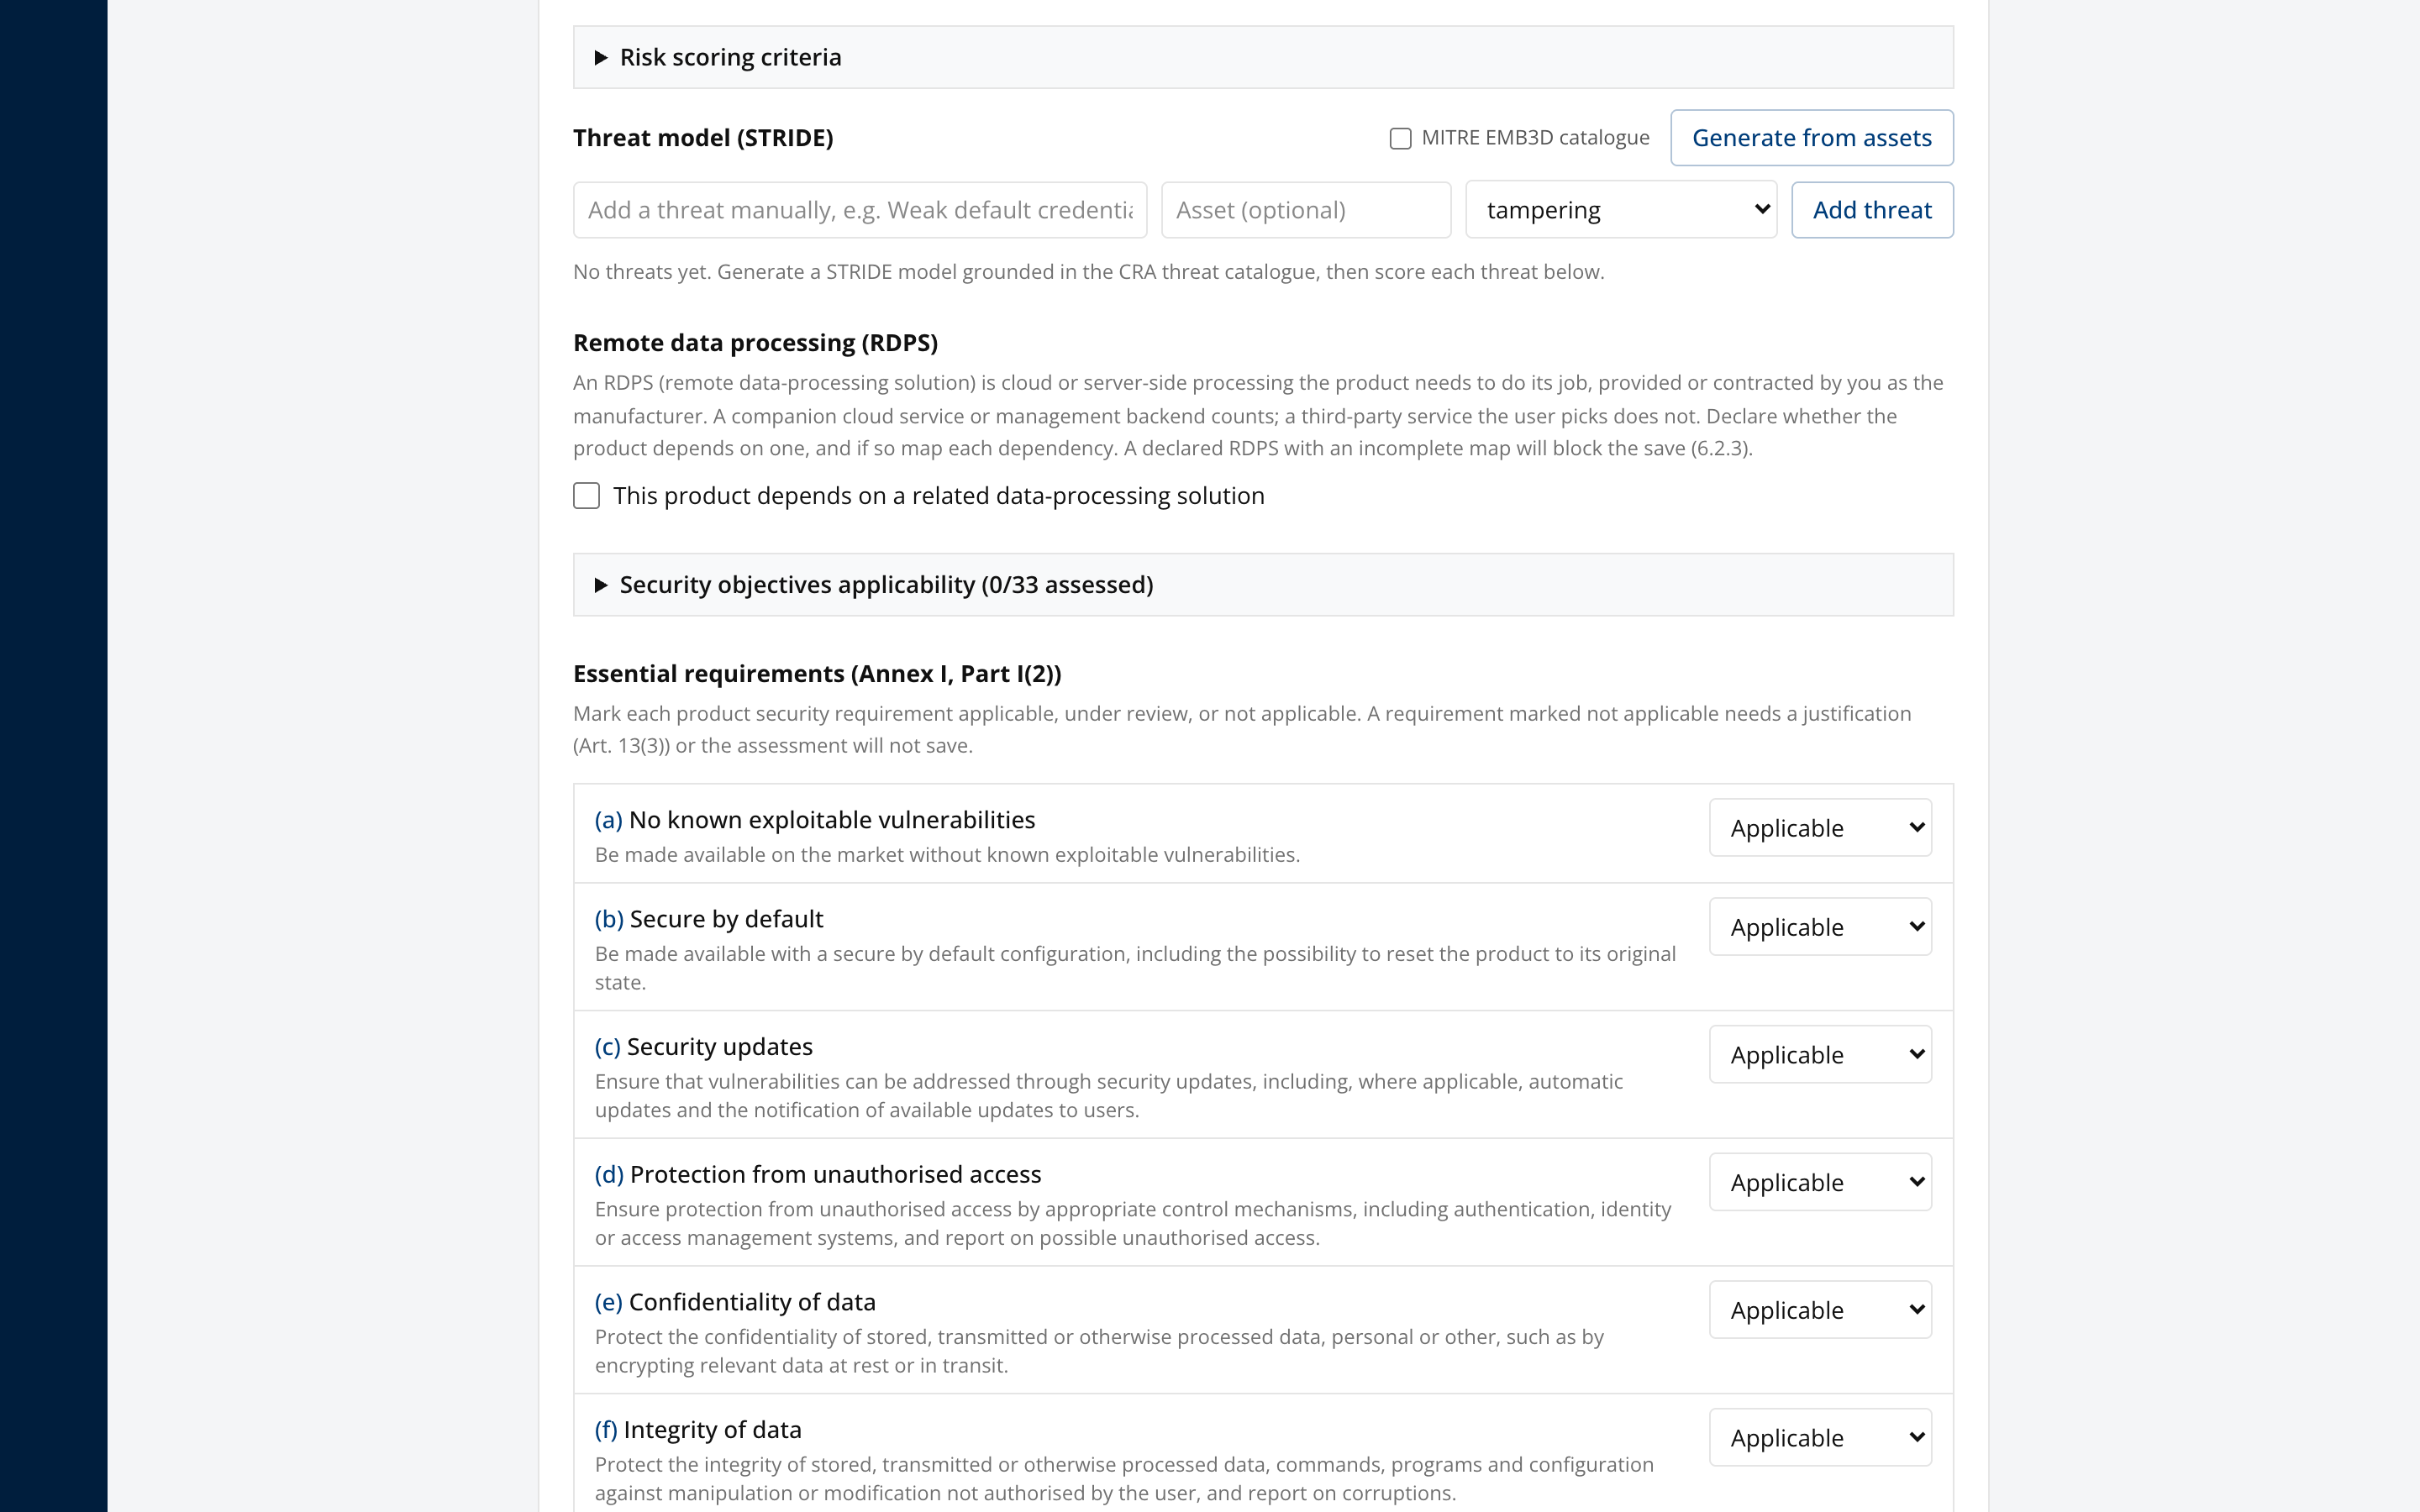
Work through Risk assessment, covering assets, data-flow diagrams, the STRIDE threat model, remote data processing, and the essential requirements under Annex I Part I(2).
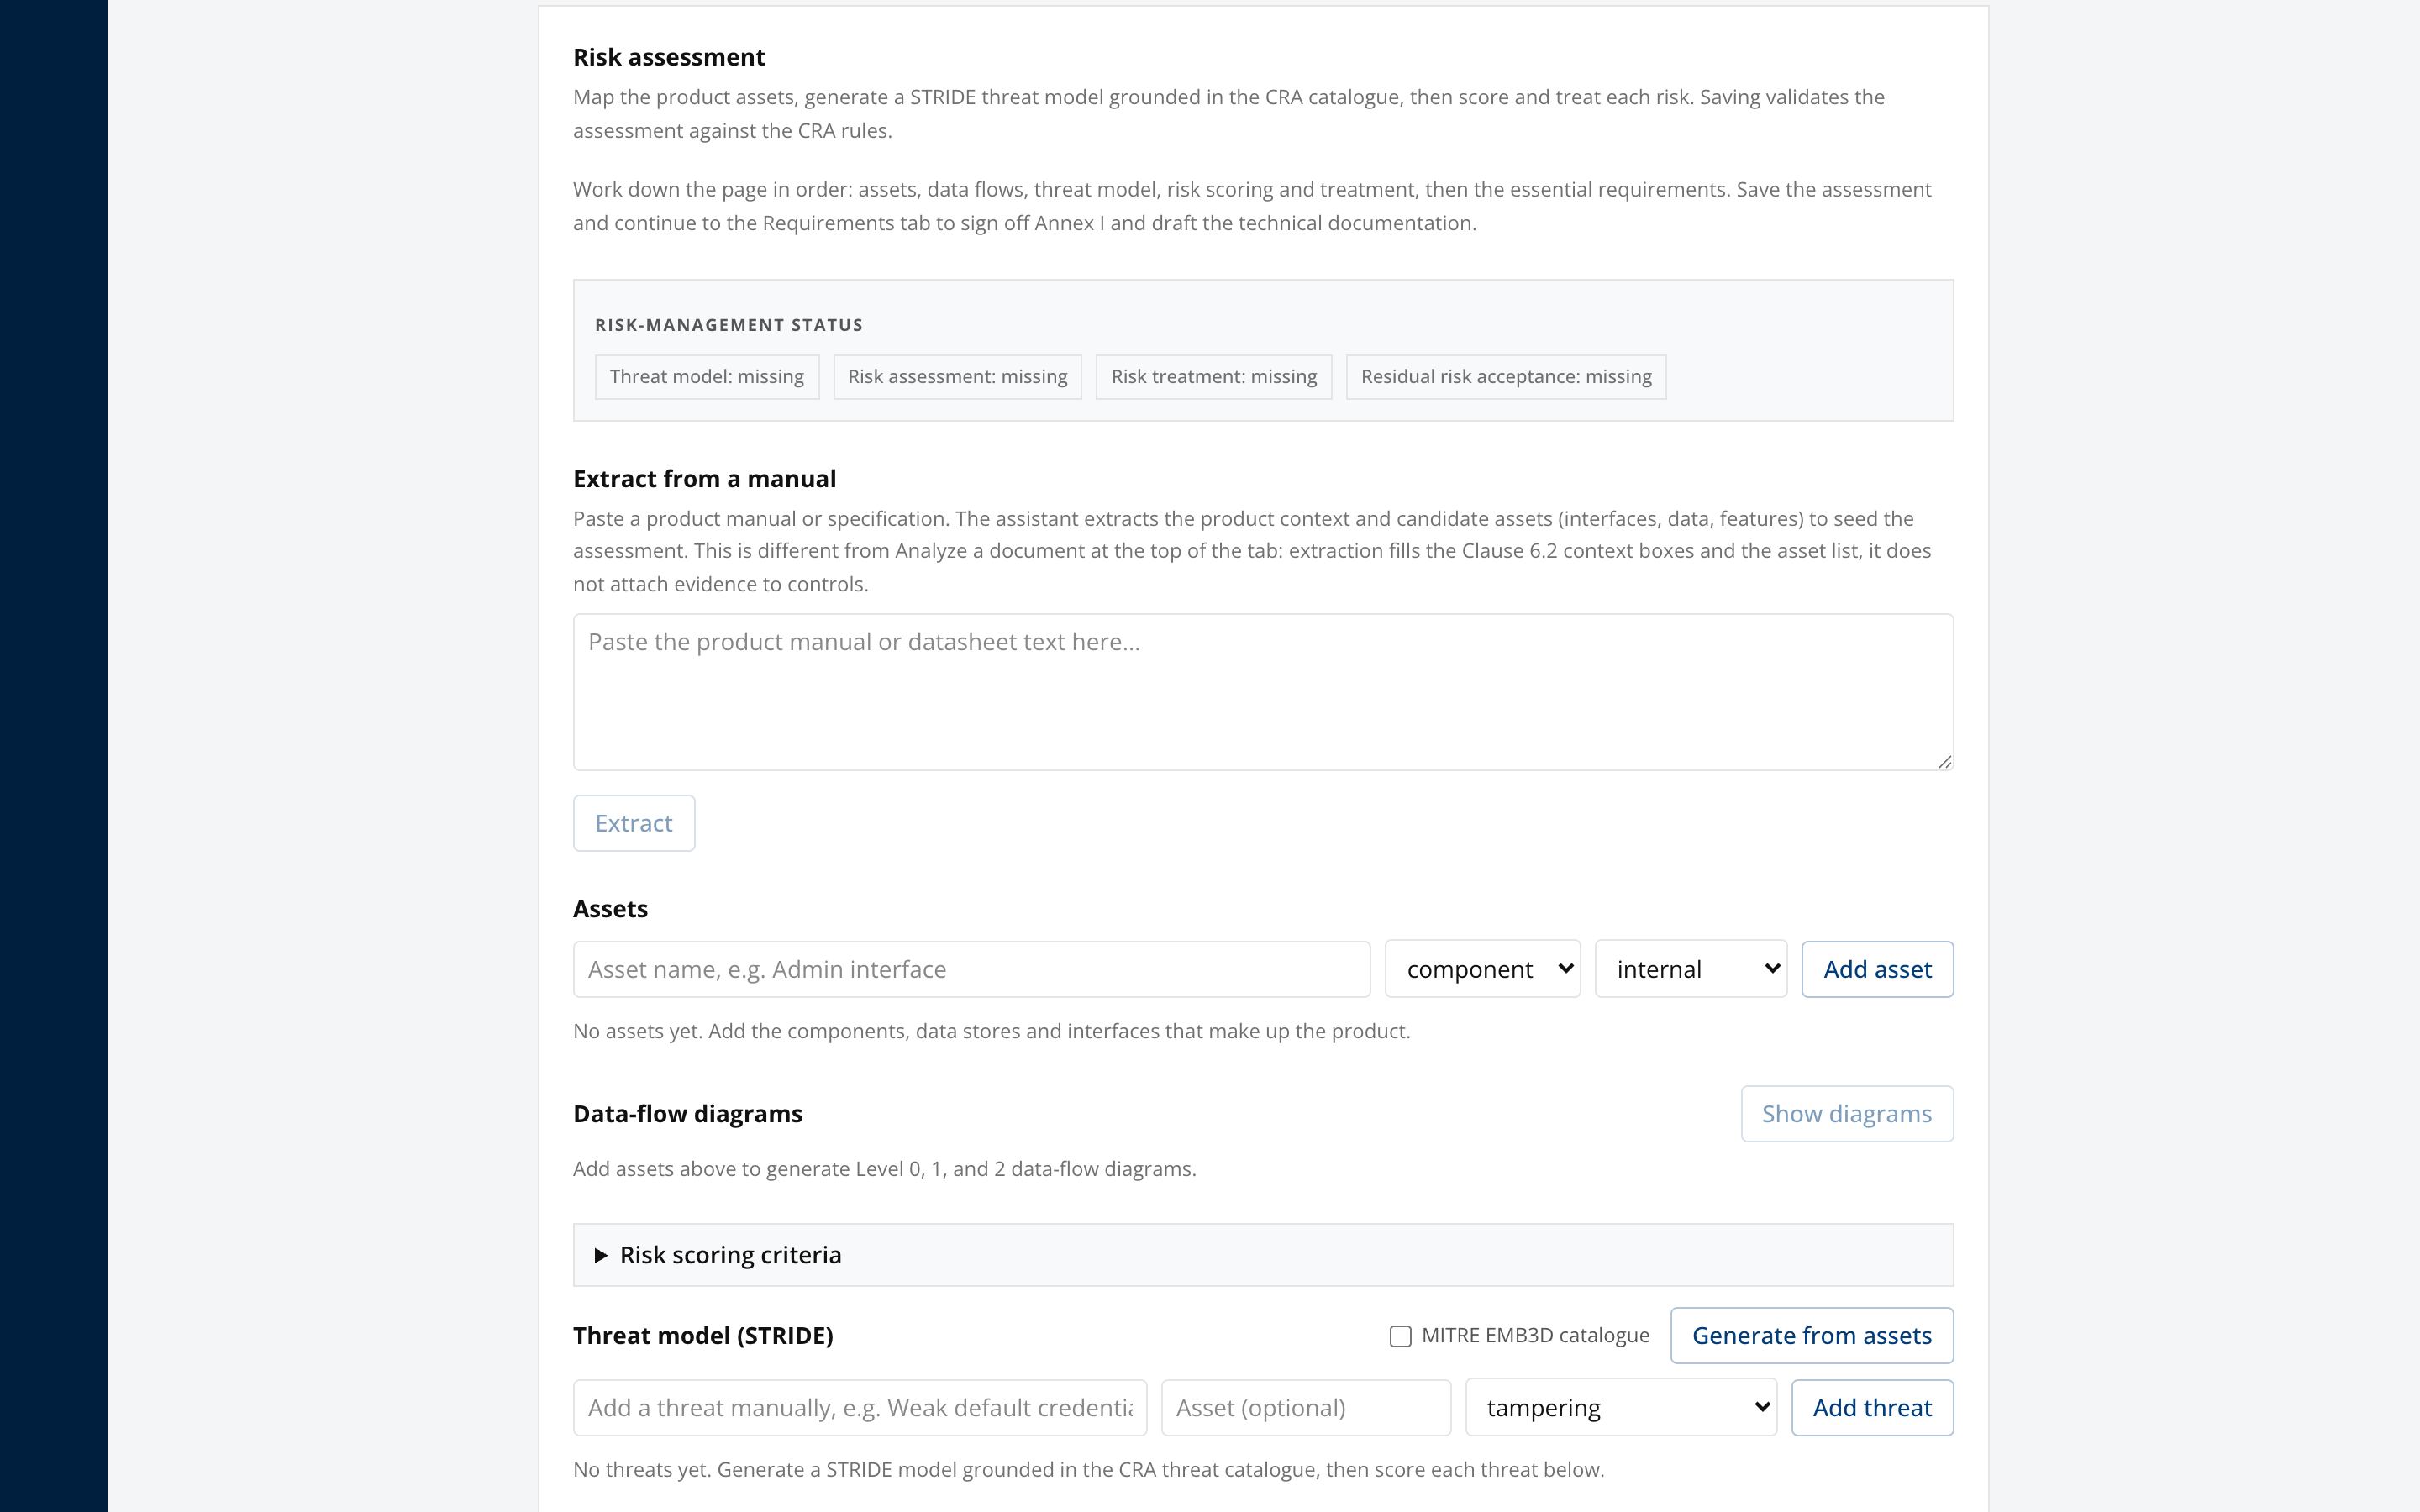
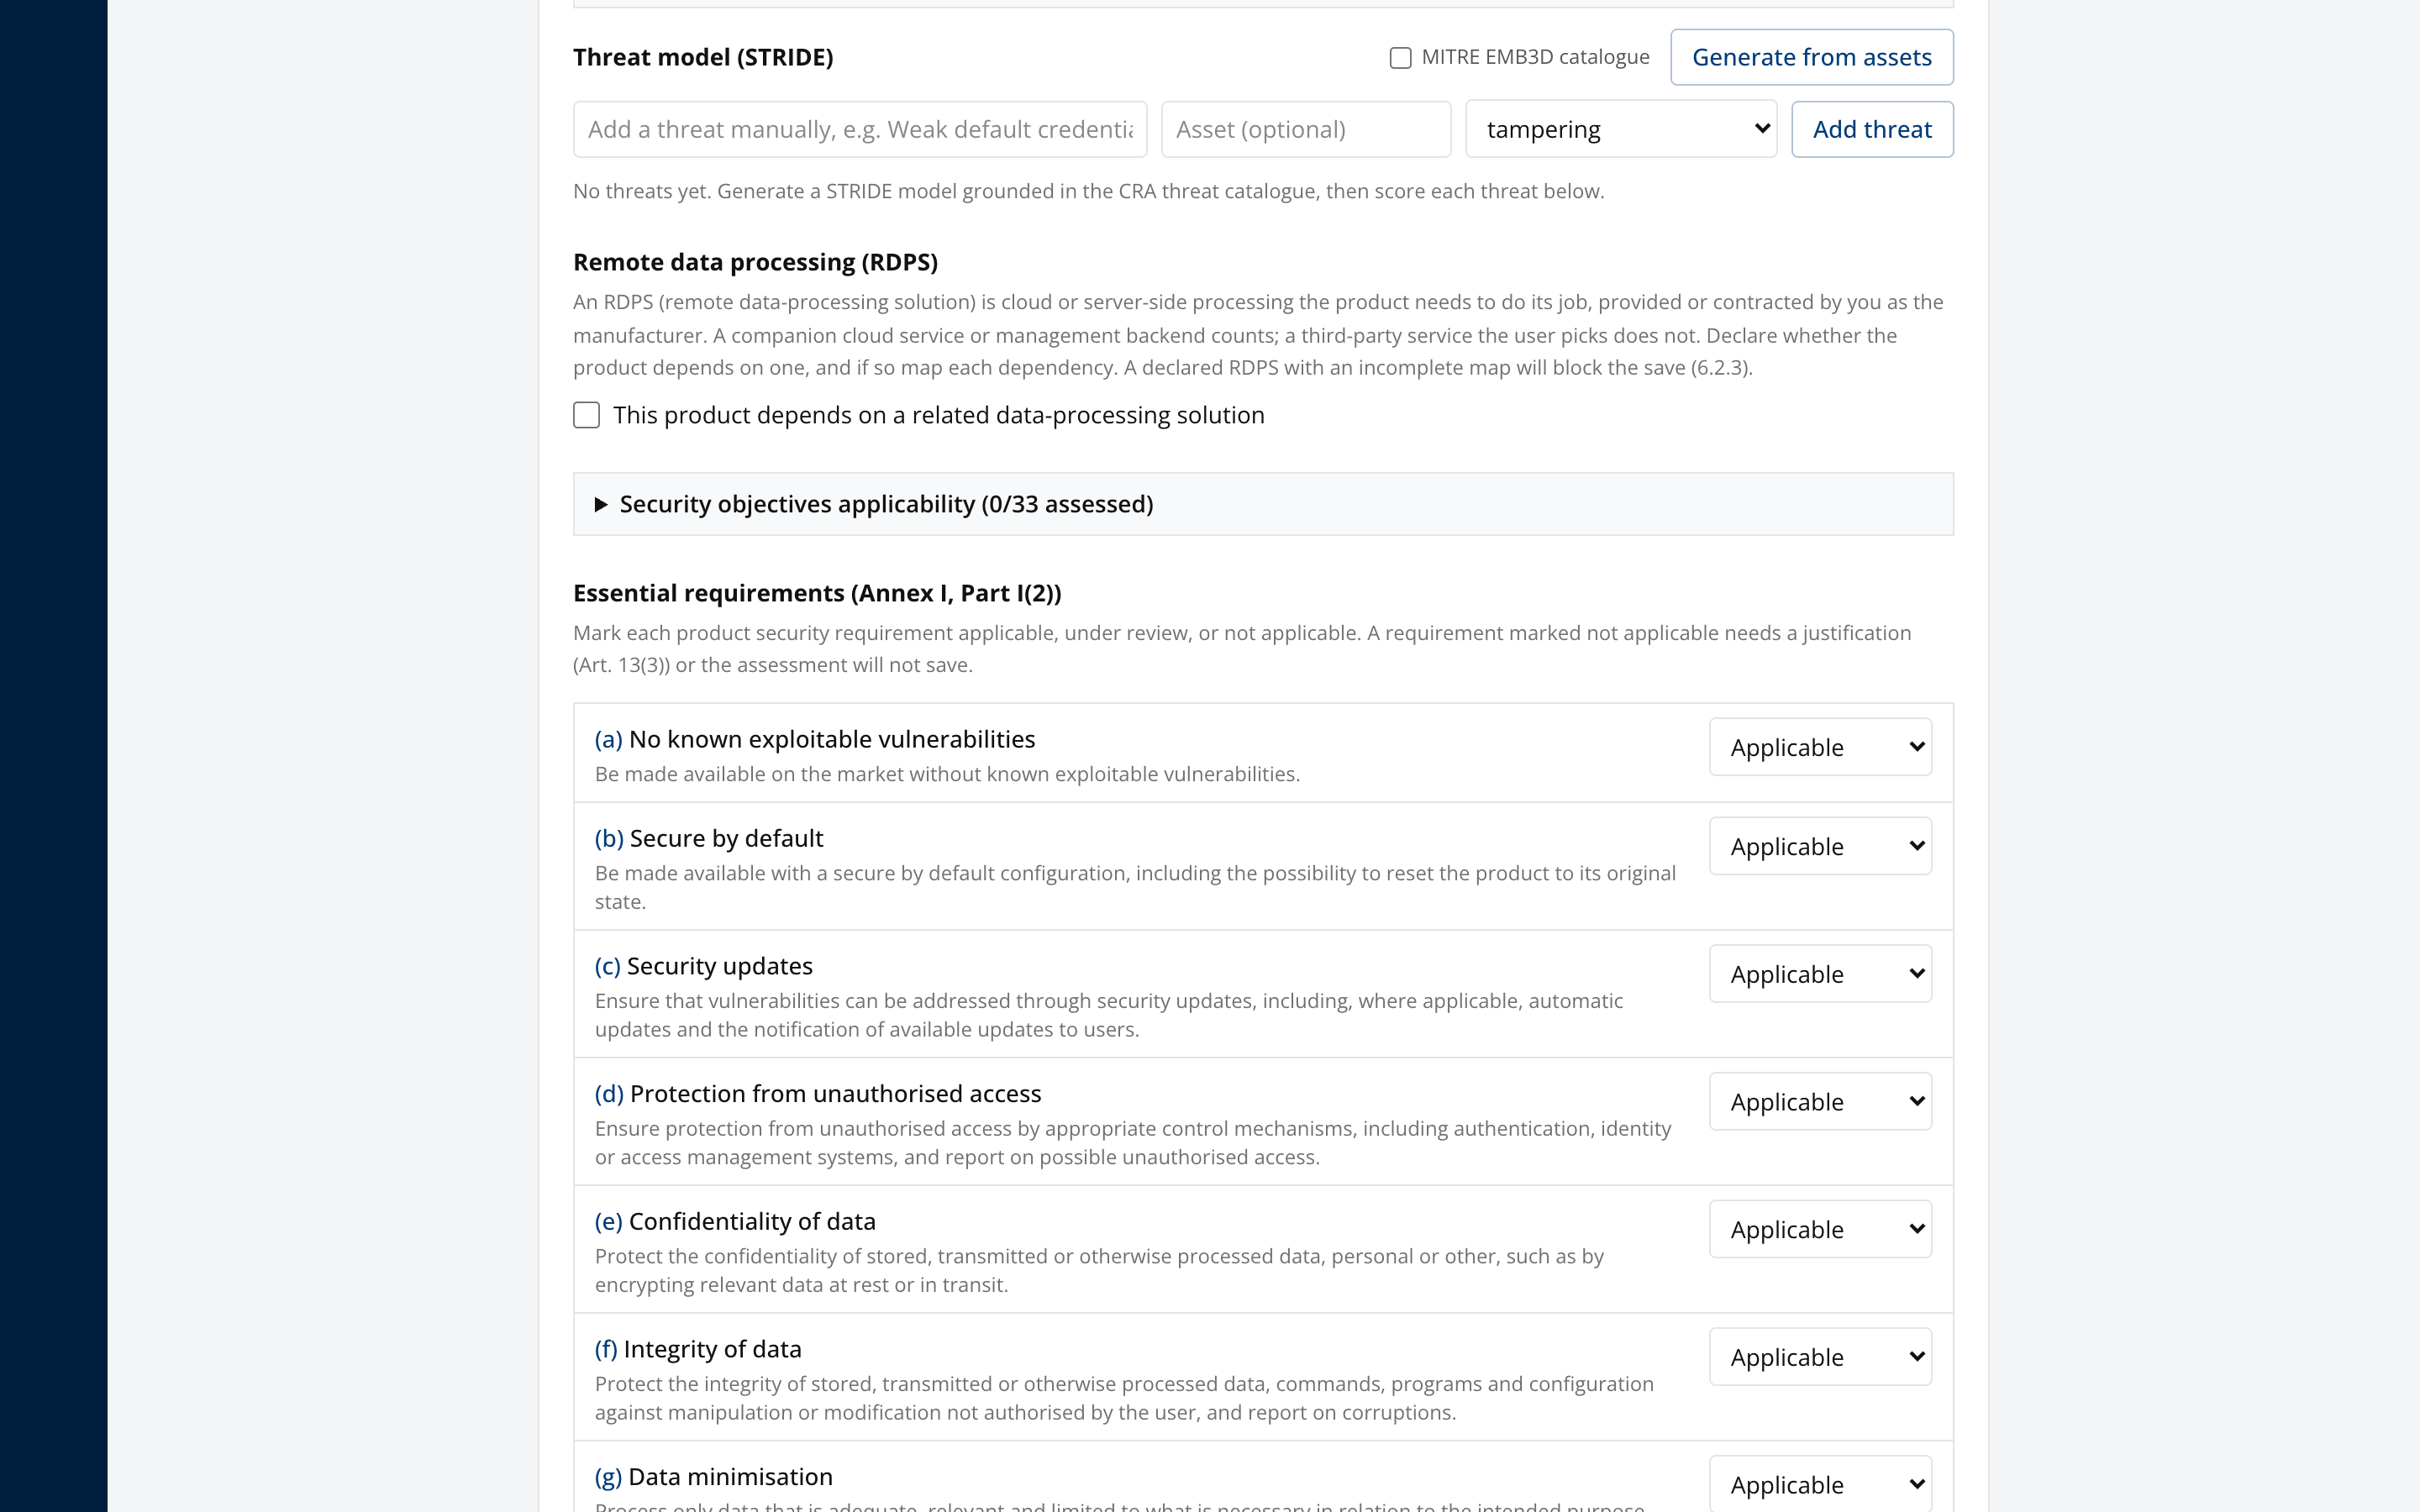
The risk assessment is what determines which of the 13 Part I(2) product security requirements are applicable to this product. Skipping it leaves every requirement marked applicable and inflates the work in the next step.
Step 8. Work the Annex I checklist
Open the Requirements tab.
This is the self-assessment against all 22 Annex I requirements, being the overarching Part I(1) requirement, the 13 Part I(2) product security requirements, and the 8 Part II vulnerability handling requirements.
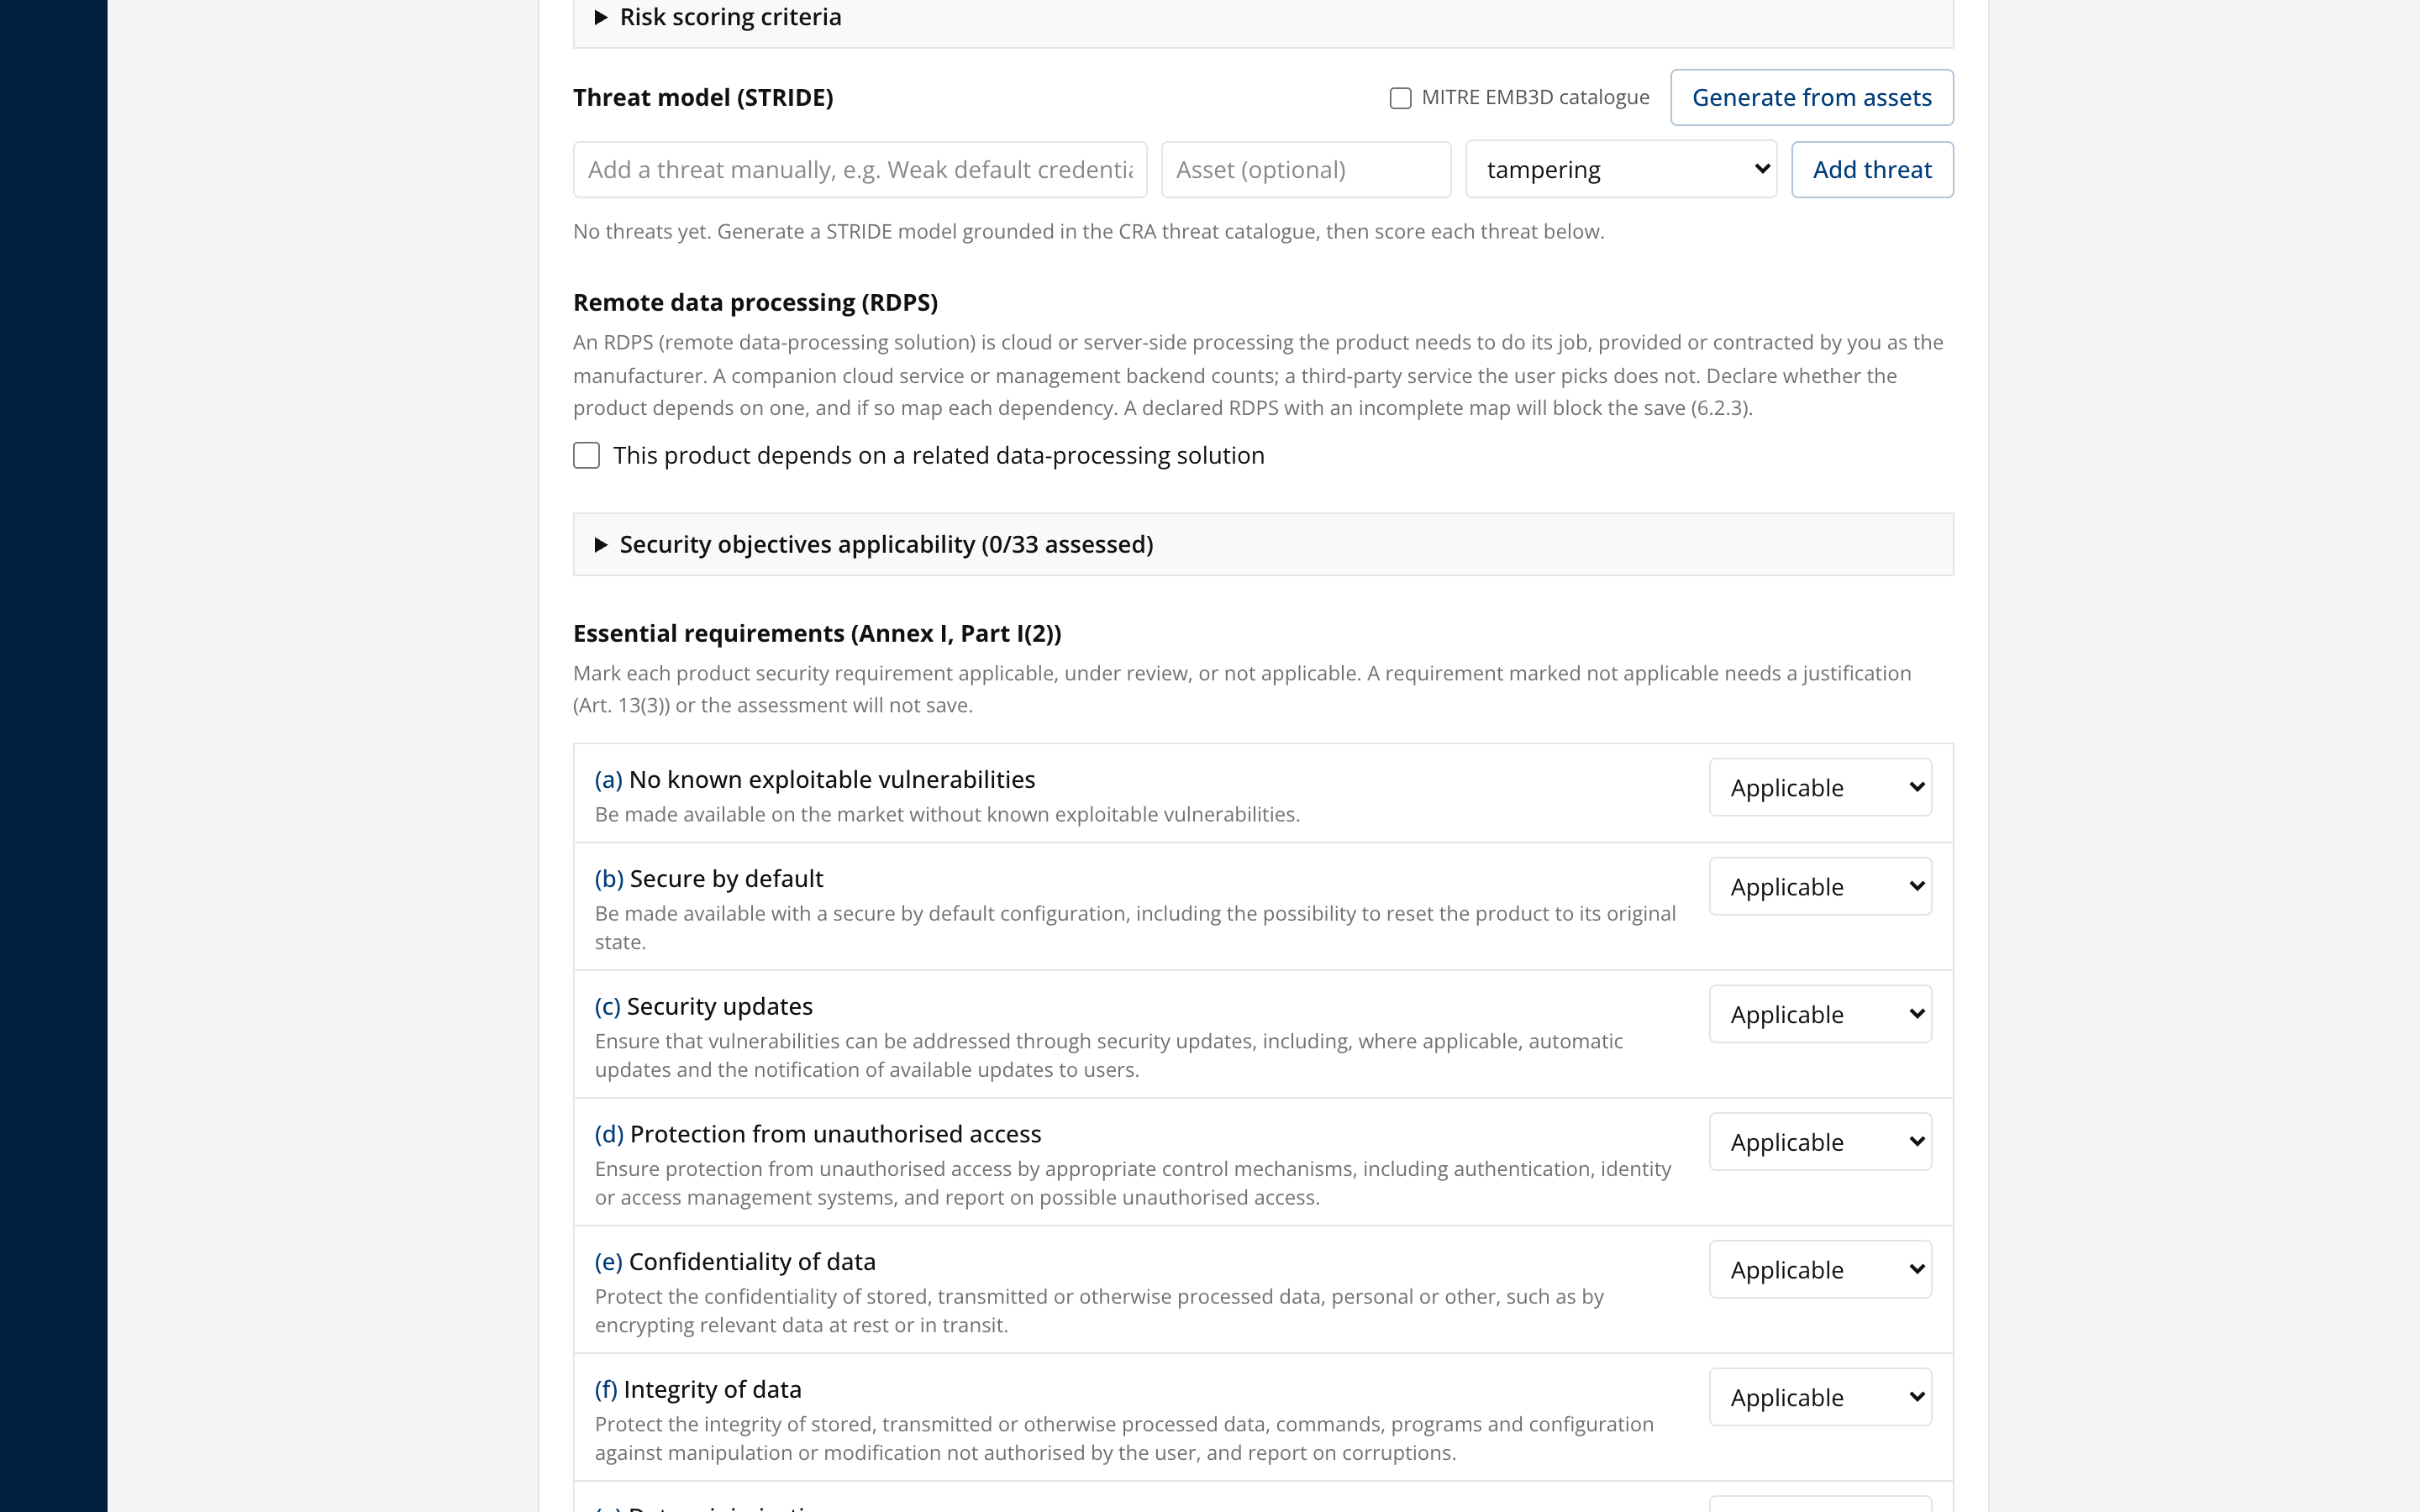
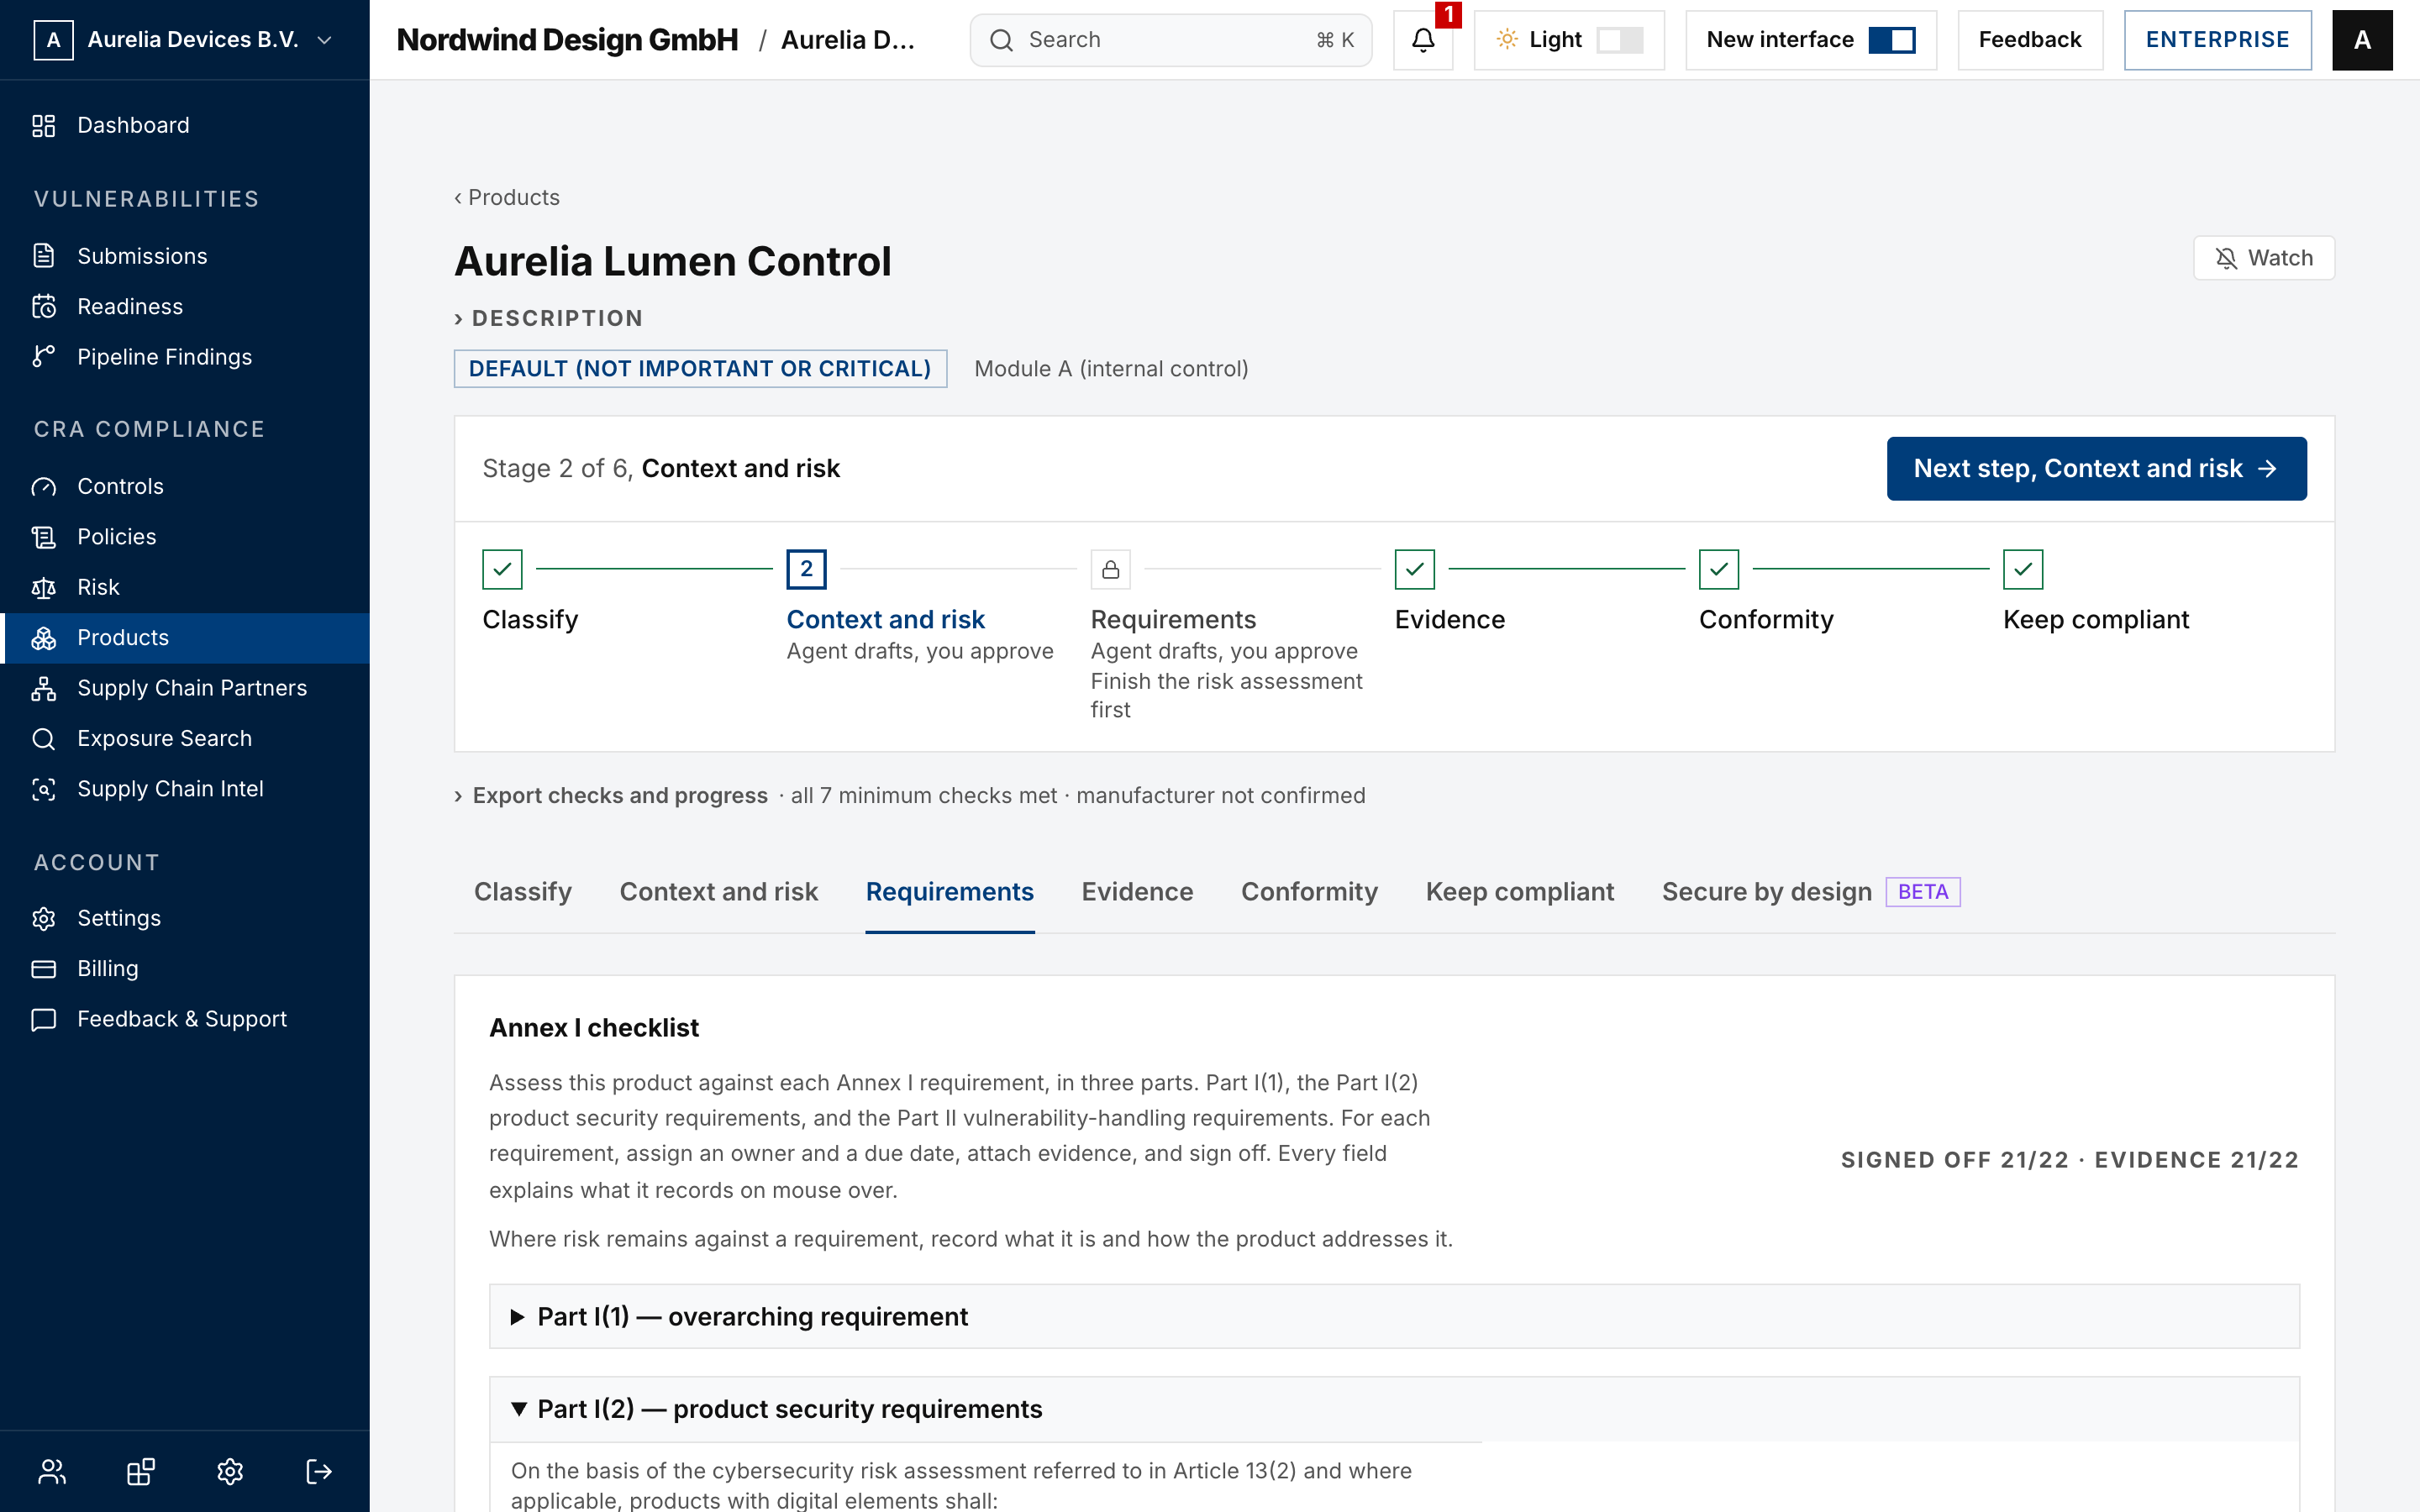
For each requirement, assign an owner and a due date, record the evidence, capture sign-off, and note any residual risk. Owners are emailed when an item comes due.
Applicability for the Part I(2) items comes from the risk assessment in Step 7. If something is marked applicable that should not be, fix it in the risk assessment rather than here.
Assign owners early even if evidence is months away. An unassigned requirement has no route to completion.
Step 9. Work the secure-by-design playbooks
Open the Secure by design tab.
This is the ENISA Secure by Design and Default Playbook, 22 playbooks across four groups, tracked against this product. Each one shows its objective, the Annex I requirement it is filed under, and a release gate of five to seven assertions. There are 125 gate items in total.
Start with the row badged "start here", then the "baseline" ones, then the rest. That order is ENISA's own suggested adoption sequence, and some baseline rows name the condition that puts them there, such as whether your product can be updated after deployment. It orders your effort and nothing else: a legal requirement that applies to your product applies from the start, whatever phase its playbook carries.
Tick a gate item when the product meets it. Expand "Principle, checklist and minimum evidence" for ENISA's implementation guidance, which is reference material and is not tracked. Evidence already attached to the product appears under the playbook bearing on the same Annex I requirement, so tick it rather than describing it again.
Sign a playbook off only once its gate is complete, and press Save playbooks before signing, because the server checks the saved gate rather than what is on screen. As on the Annex I checklist, your name comes from your account and sign-off is recorded immediately.
This tab does not gate the export. ENISA guidance confers no presumption of conformity, so an incomplete playbook set will not block the technical file. ENISA's own Annex C maps the 22 across every Annex I essential requirement, but six of those rest on a single playbook each, so those are the rows to check first if you are using the playbooks as an Annex I work breakdown. Treat the tab as the engineering record behind the Annex I work, not a substitute for it.
Step 10. Attach evidence
Open the Evidence tab.
Attach the artifacts that substantiate each control. Confirmed evidence appears here once accepted.
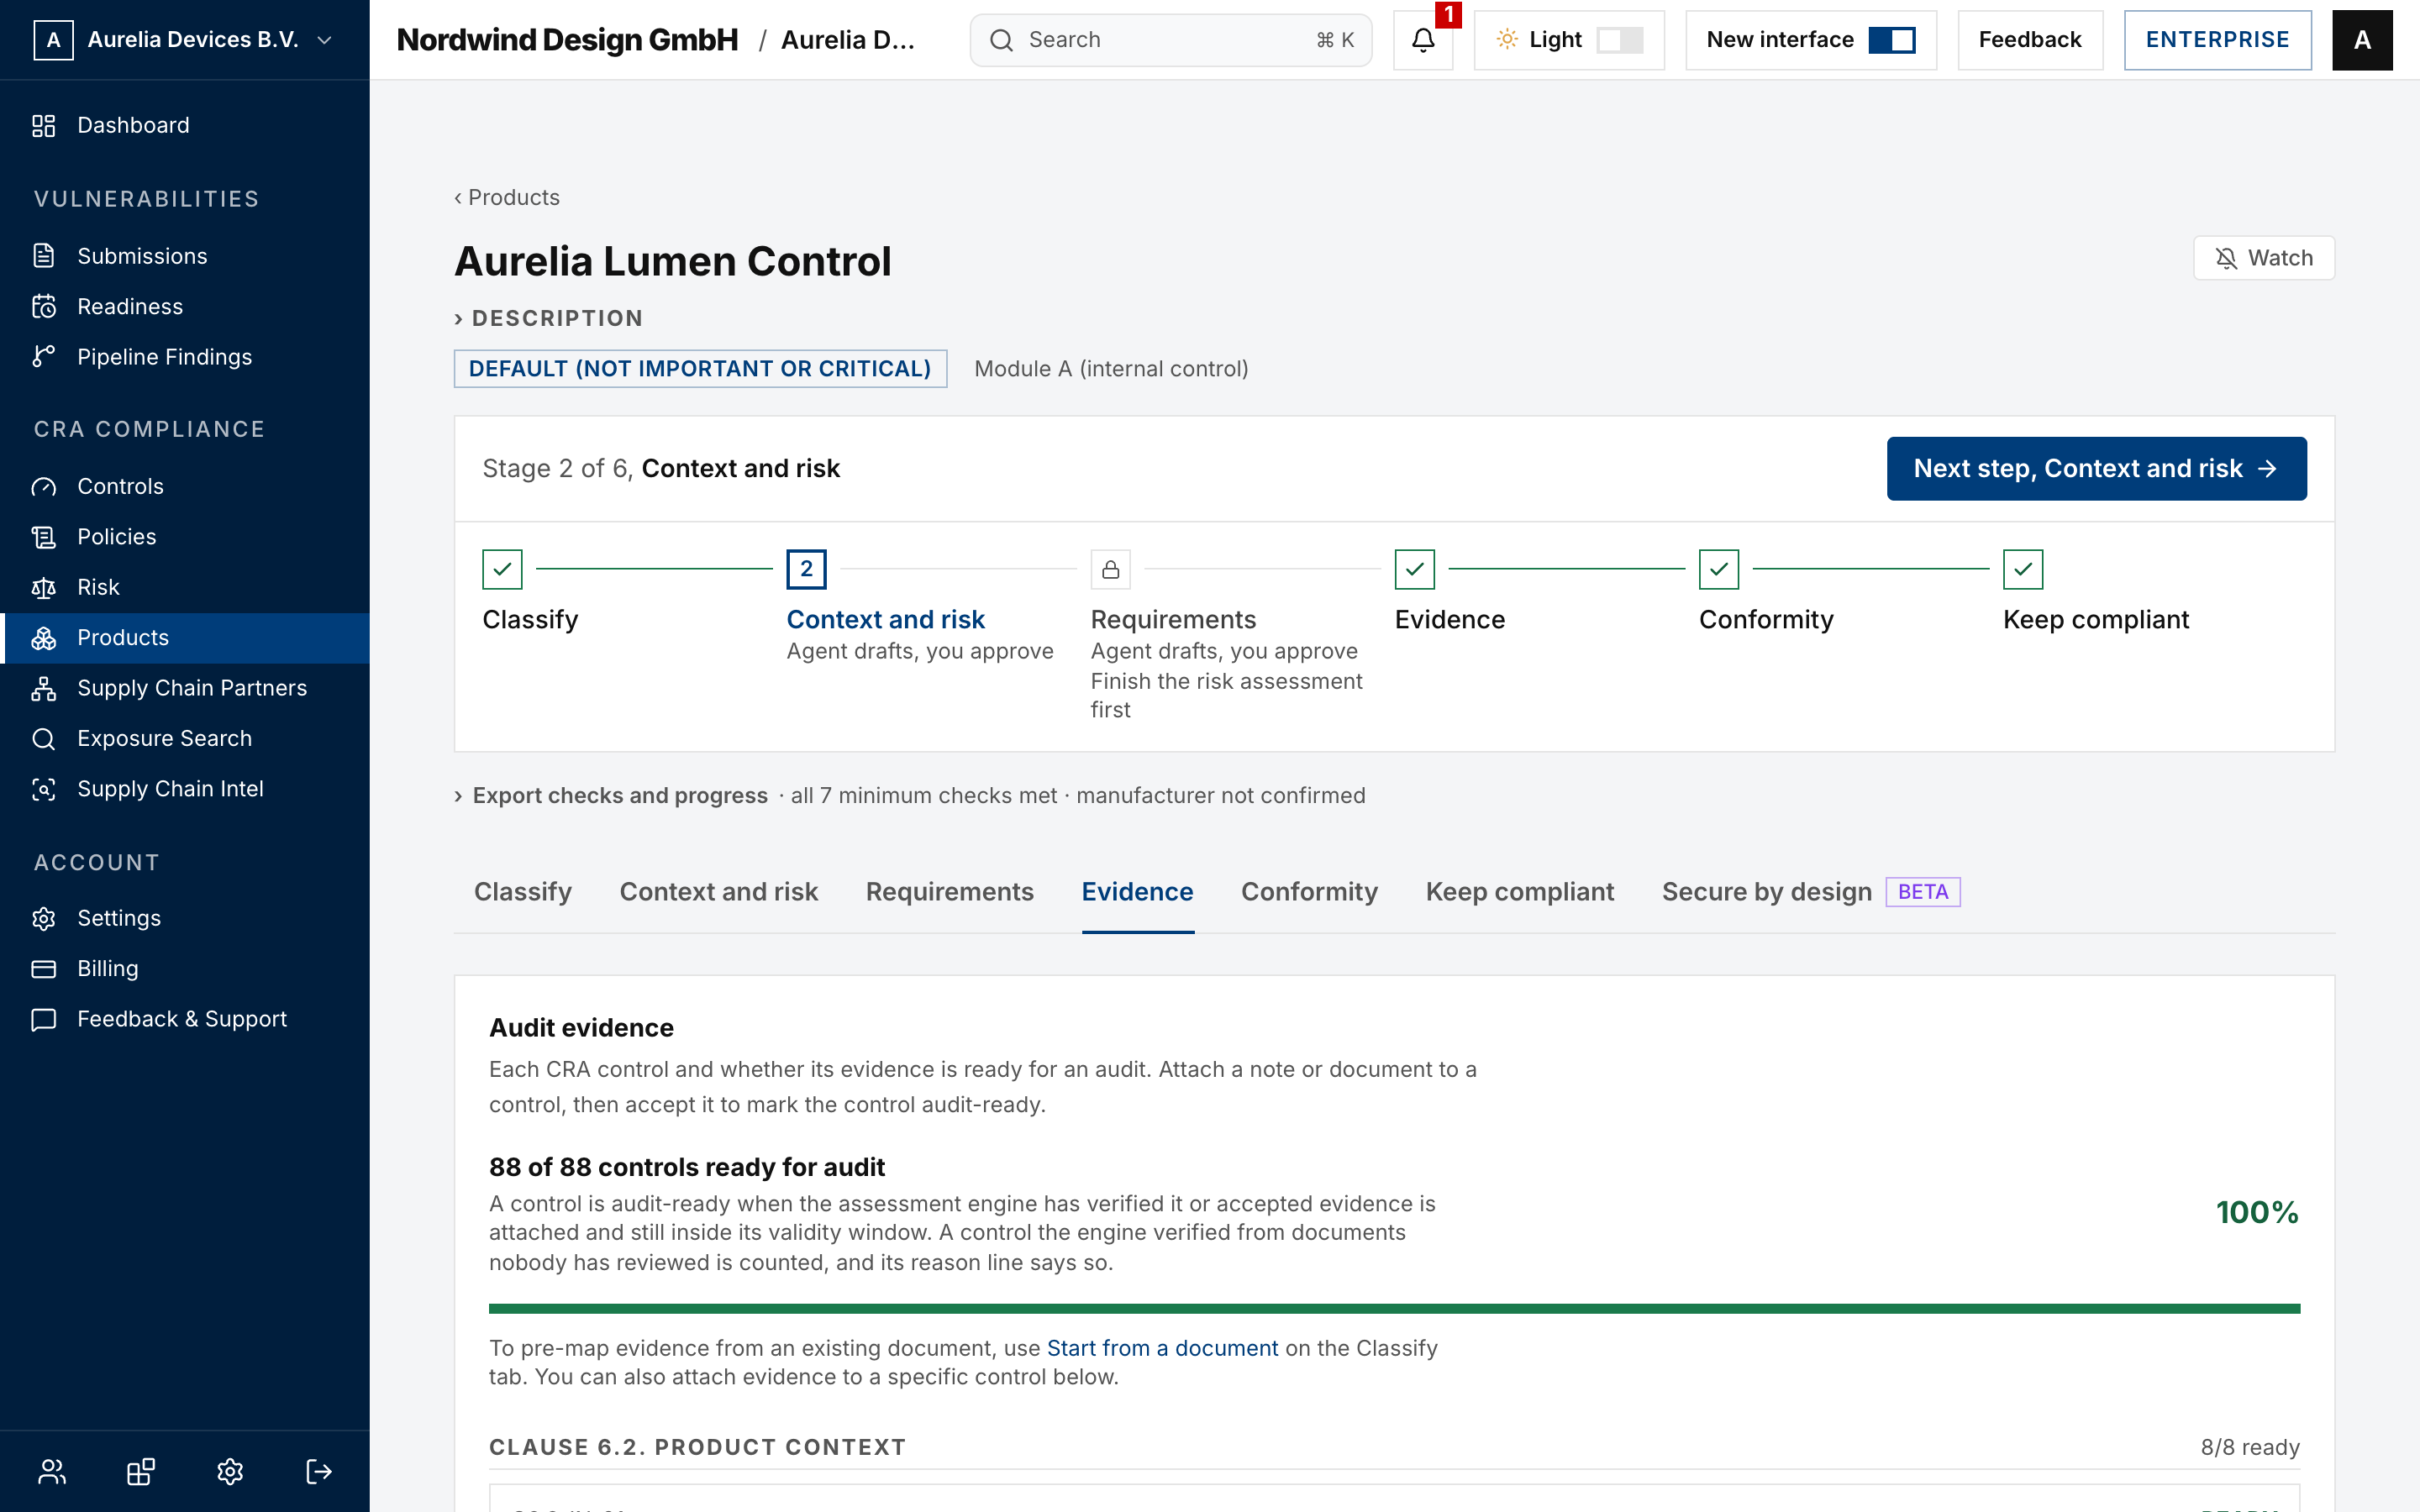
The Clause artifacts (6 and 7) section on the Requirements tab covers FprEN 40000-1-2 Clauses 6.2 through 7.10 and drafts the documents that make up the CRA Annex VII technical file:
- Clause 6, risk management. Product context (6.2), risk acceptance criteria (6.3), risk assessment (6.4), risk treatment (6.5), risk communication (6.6) and risk review (6.7).
- Clause 7, lifecycle activities. Cybersecurity planning (7.2), cybersecurity requirements (7.3), secure architecture and design (7.4), secure implementation (7.5), verification and validation (7.6), secure production and distribution (7.7), product cybersecurity monitoring and issue management (7.8), planning for secure decommissioning (7.9) and third-party component cybersecurity management (7.10).
Step 11. Generate the conformity documents
Open the Conformity tab.
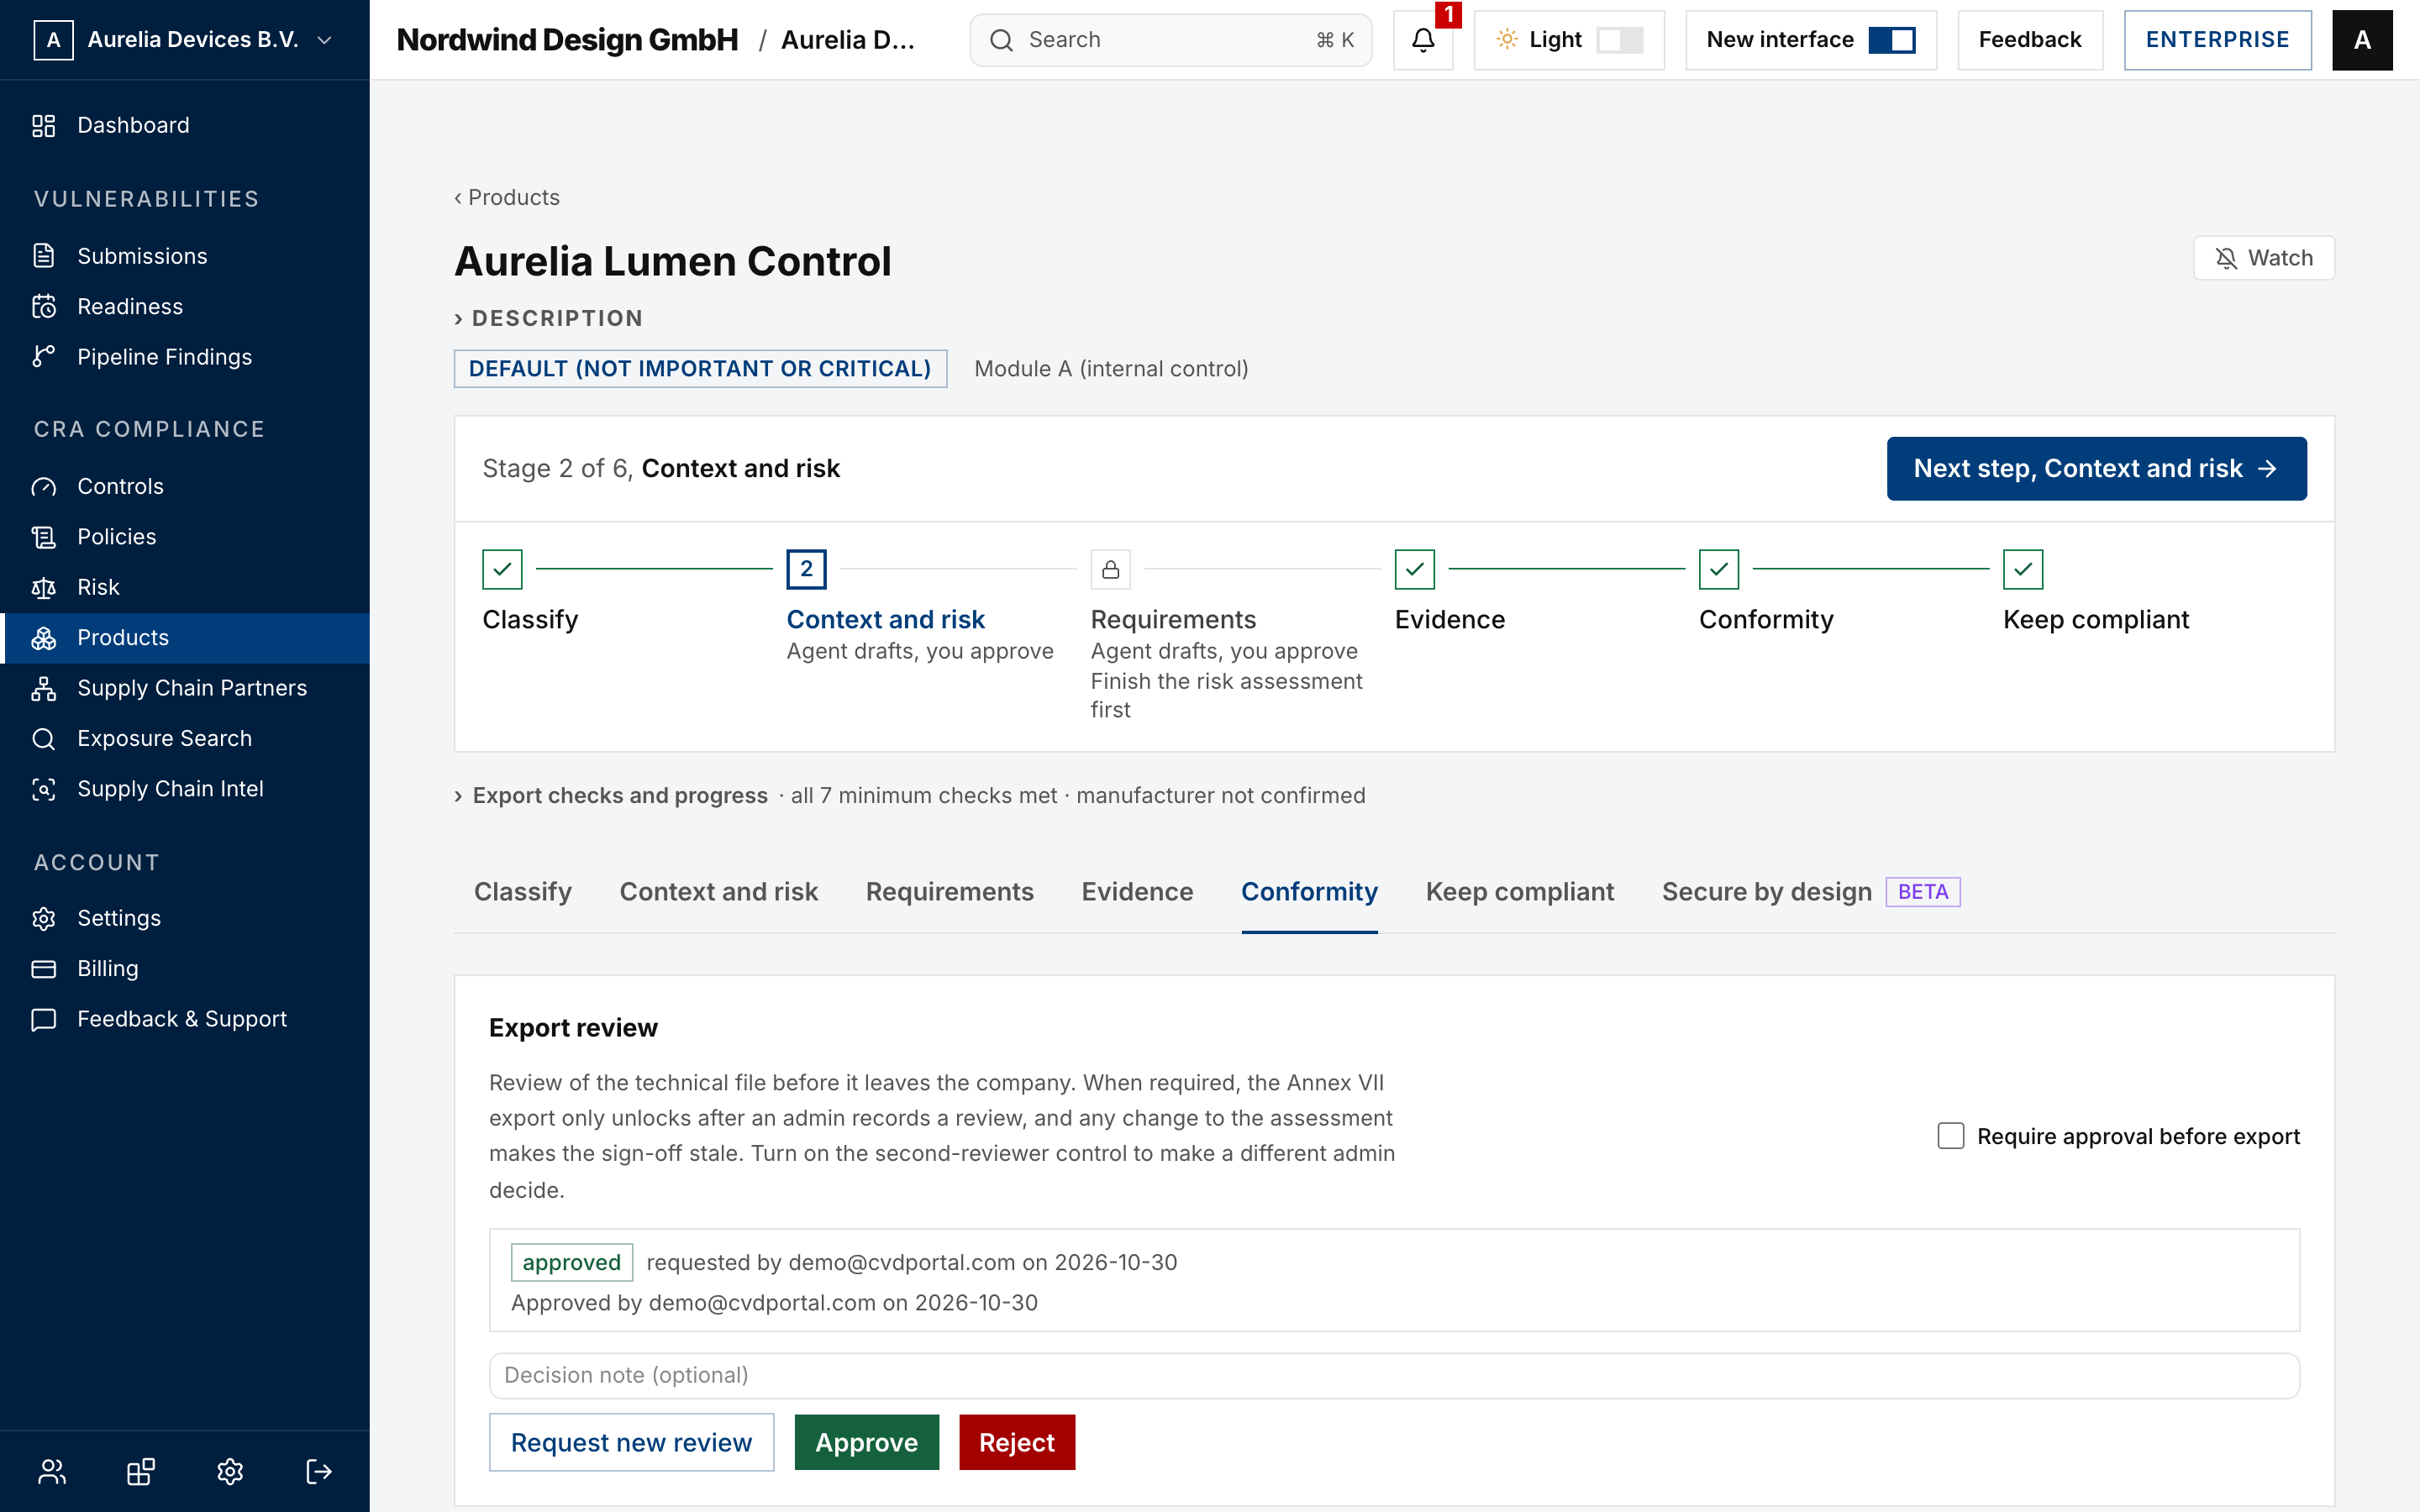
Export review. Turn on Require approval before export so the Annex VII export unlocks only after an admin approves the current file. By default the admin who submits the file can also approve it. For a four-eyes review, also turn on Require a second admin to review. Then the requester cannot decide their own review. An admin can approve only when every export check passes. Until then Approve is off and the panel lists the open checks. Any later change to the file makes the approval stale, and the export locks until an admin approves again. A change to the notified body, the importer or the distributor also makes it stale. While a required review is missing or stale, the Conformity stage is not done.
Conformity documents. Generate the draft EU Declaration of Conformity (Annex V), the simplified declaration for inclusion with the product (Annex VI), and the Annex VII technical documentation index.
These are drafts with placeholders and are explicitly not for issuance. They are a starting point for your legal review, not a substitute for it.
Technical file. Export as print or PDF, or download JSON. The export runs the CRA conformance checks. It refuses a product with a contradiction in the record or an open export check. Most export checks are minimum floors, for example at least one applicable requirement signed off. So a file can export while work remains, and its file status then reads "Incomplete". Remaining work gives the full list.
CE marking. Guidance for affixing the CE marking under Articles 29 and 30, tailored to this product's route.
User information (Annex II). Set the support period in months under Article 13(8), record how you determined it, and save it. An end date alone is not enough, because the snapshot needs the month count. Then generate the draft user information sheet that must accompany the product.
Place on the market. The last card on the tab. Only an Admin sees it. Select Capture snapshot on the day the product is placed on the EU market. The snapshot uses the same checks as the export. It refuses while an export check is open, while the record has a contradiction, while an applicable Annex I requirement has no sign-off or no evidence, or while no support period in months is recorded. The export needs only one requirement signed off and one evidenced. The snapshot needs all of them. The first snapshot completes the Conformity stage, starts the periodic review clock and, if no start is recorded, starts the support period.
Step 12. Start the monitoring clock
Open the Keep compliant tab.
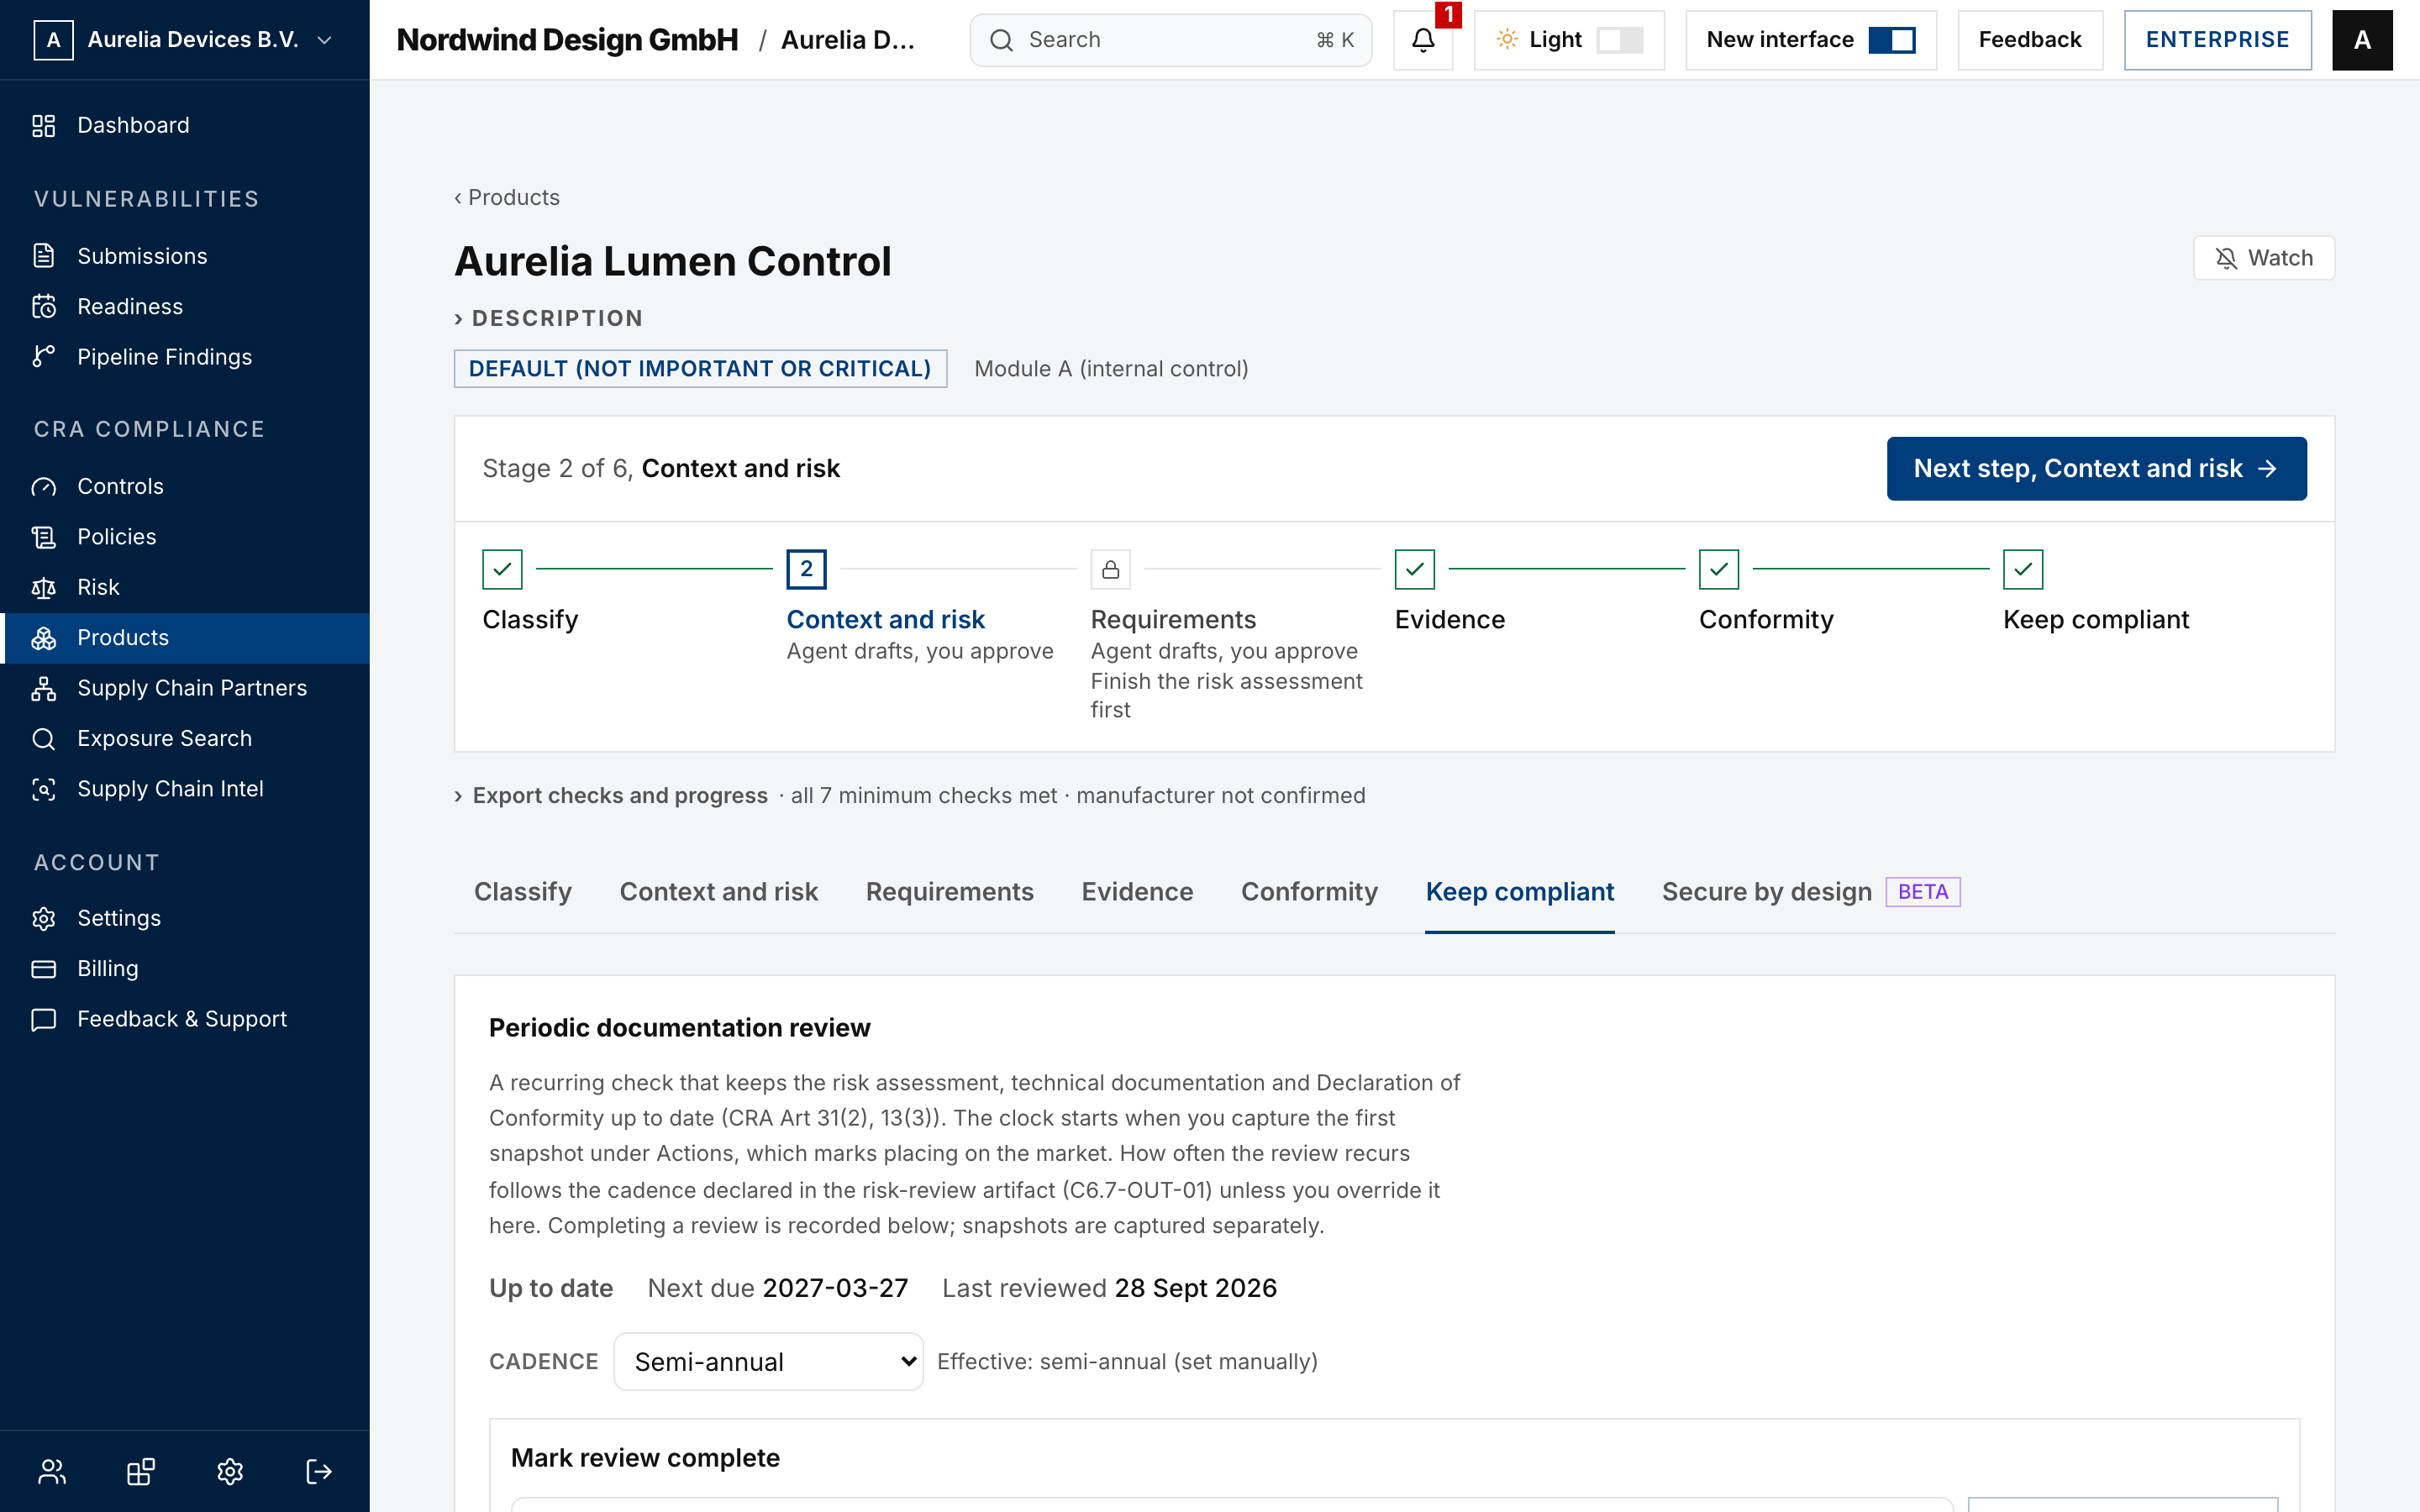
Periodic documentation review. The recurring check that keeps the risk assessment, technical documentation and Declaration of Conformity current under Articles 31(2) and 13(3). The clock starts with the first snapshot under Place on the market on the Conformity tab. Cadence follows the risk-review artifact C6.7-OUT-01 unless overridden to quarterly or semi-annual.
Actions. After a substantial modification, select Capture snapshot here. The button stays disabled until the four-factor test in Substantial modification records a substantial verdict. To archive or delete the product, use the Archive or delete card at the bottom of the Classify tab.
Monitoring and review. Record triggers that require re-reviewing the assessment, being a threat landscape change, a cybersecurity issue, or a risk exposure change. A trigger stays open until a documentation review closes it.
Vulnerabilities found in the product do not belong here. Those go through the Article 14 reporting workflow in the CVD Portal side of the app.
Trust portal. Optionally share the product's latest frozen snapshot with approved viewers. Only snapshots are shared, never live drafts.
Step 13. Confirm readiness
Switch the rail to CRA Portal, open Overview and review Product conformity readiness.
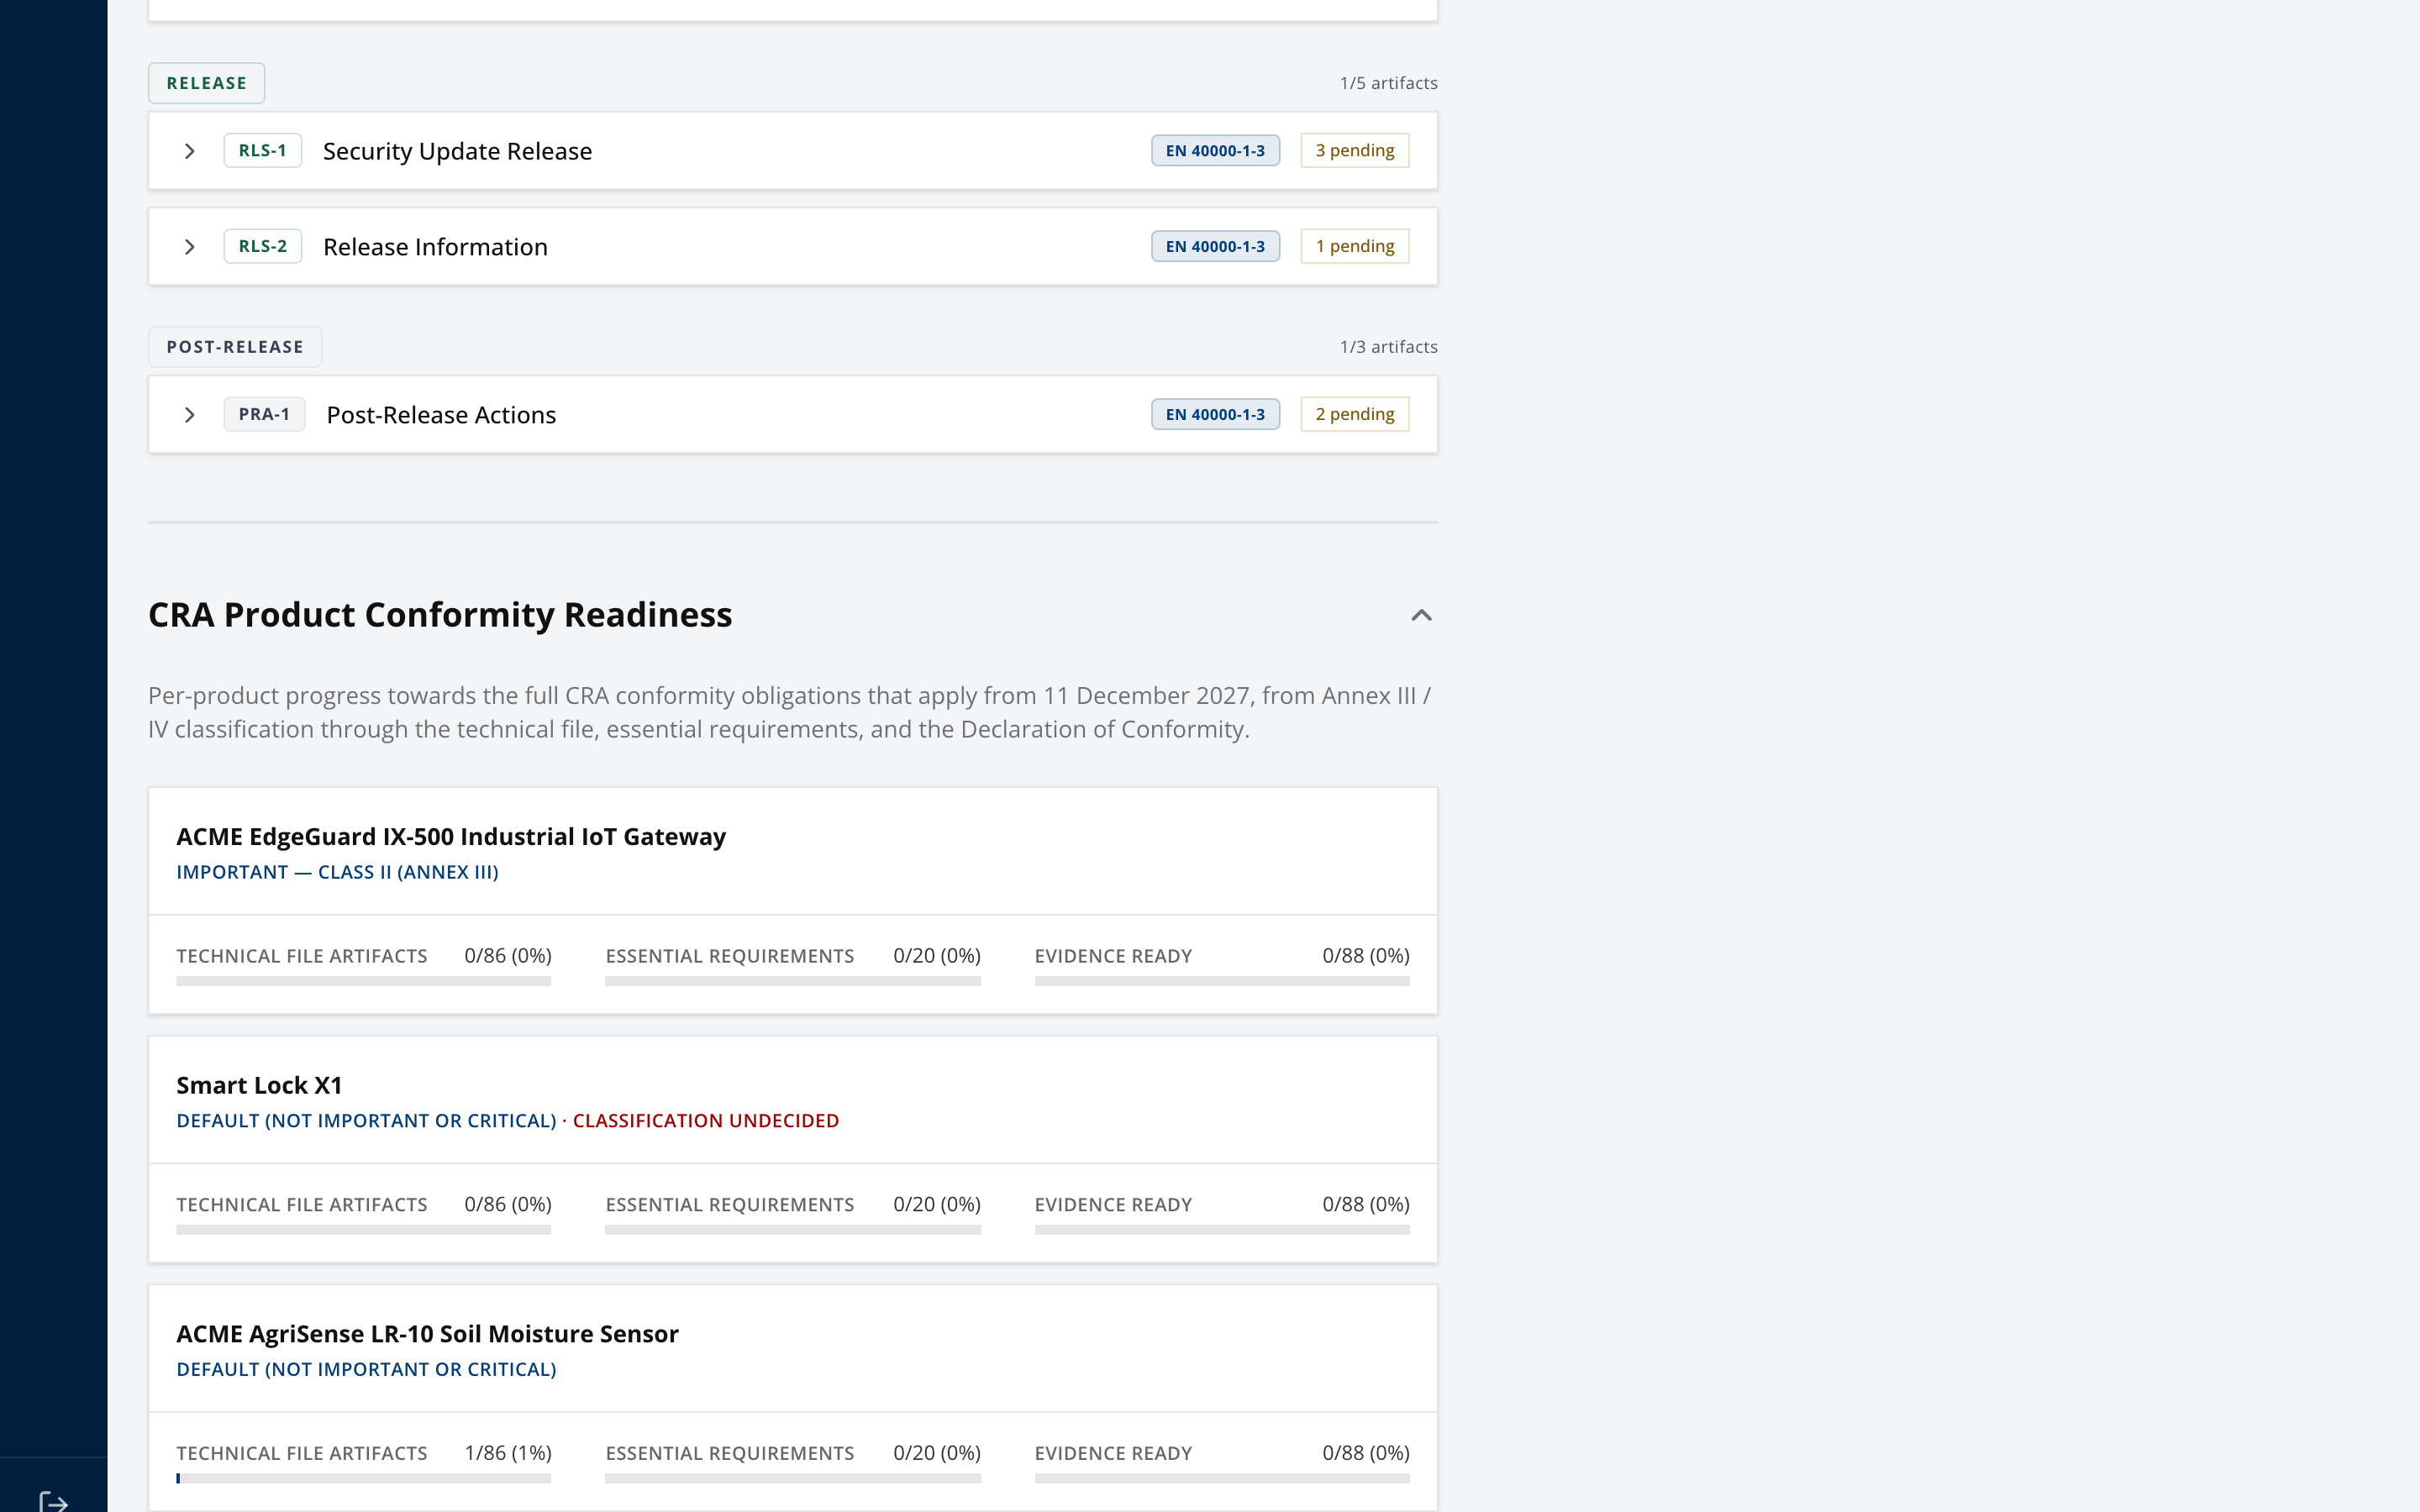
This is the view to take to a management review. It shows every product against the December 2027 obligations rather than a single product in isolation.
Completion checklist
- Product created with a functional description
- Annex III / IV classification decided and saved
- Classification basis recorded, as required by Article 13(4)
- Harmonised standards and any EUCC certification listed
- Conformity route confirmed and understood
- Product context complete
- Risk assessment complete, including assets, data flows and threat model
- All 22 Annex I requirements have an owner
- Evidence attached and confirmed against controls
- Export review enabled, with a second admin where your process needs one
- Draft Declaration of Conformity and Annex VII index generated
- Support period set and Annex II user information sheet generated
- Technical file exported with no open export check
- First snapshot captured and the review clock running
Important limitations
- Every generated conformity document is a draft with placeholders. None is fit for issuance without legal review.
- Products in Annex III Class I or Class II require a third-party conformity route. The app prepares the technical file, it does not replace a notified body.
- No harmonised standard is currently cited in the Official Journal for the CRA, so no presumption of conformity is available to any product yet.